Since there are many steps for complete installation, I have divided it into three blogs instead of one single blog.
Part I - Download of Softwares and Installation of Prerequisites
This blog covers steps for Deployment of C2M product in Weblogic using Native Installation
Run config.cmd with ‘Run as administrator’ option
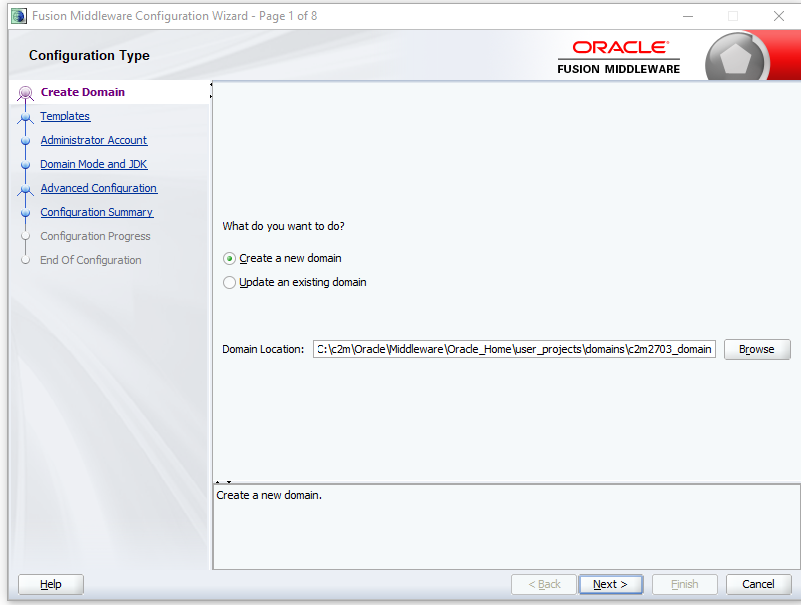
Below configuration Wizard screen opens up.
Select Create a new domain
Update the domain location. Instead of base_domain, update it to c2m2703_domain
Enter username as 'weblogic'
Enter a password for your weblogic admin server
Click on next
Select JDK that maps to your installed jdk earlier
Click on Next
On next screen,
Select Administration Server and Node Manager
You can name it as myserver also
Set listen port to 7001
Enable SSL
Set SSL port to 7002
Select per domain Default location
Enter same username and password as entered on administrator screen
Click on next
Next screen opens up
Click on Create button
As seen the new weblogic domain creation is completed.
The link for logging to admin server is visible.
Click on Finish and complete the configuration.

Navigate to your domain location
C:\c2m\Oracle\Middleware\Oracle_Home\user_projects\domains\c2m2703_domain
Enter startWebLogic.cmd
Weblogic server should start up
Next open a browser window and enter you weblogic admin server link
http://localhost:7001/console
Enter username and password as defined in the administrator domain configuration earlier
Navigate to Machines link on the domain configuration
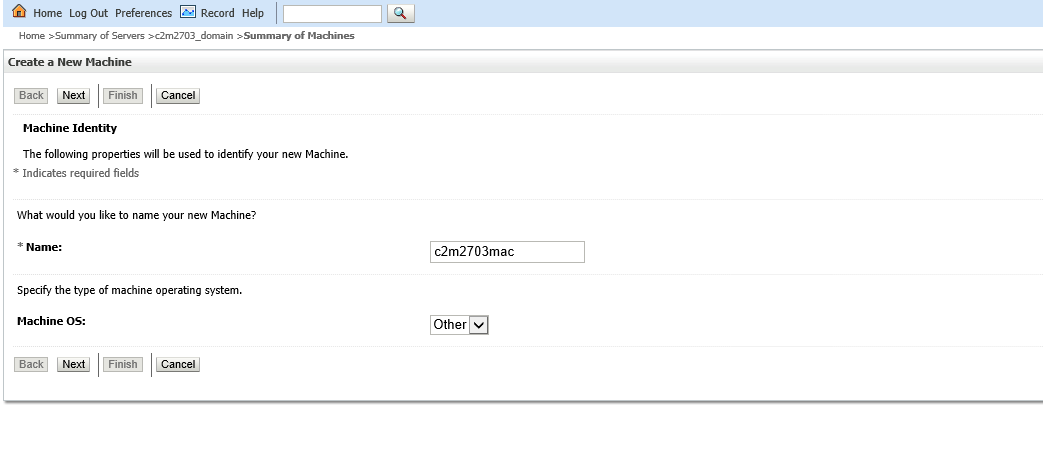
Click on New button.
Enter c2m2703mac in name field
Navigate to Server start tab
Set the following values in classpath. Put in single line. Don't use newline.
C:\c2m\ouaf\C2M2703\splapp\standalone\lib\xalan-mod-2.7.1.jar;C:\c2m\ouaf\C2M2703\splapp\standalone\lib\serializer-2.7.1.jar;C:\c2m\ouaf\C2M2703\splapp\standalone\lib\antlr-2.7.6.jar;C:\c2m\Oracle\Middleware\Oracle_Home\wlserver\server\lib\weblogic_sp.jar; C:\c2m\Oracle\Middleware\Oracle_Home\wlserver\server\lib\weblogic.jar
Set below value in arguments field. (We will see how to set this using setUserOverrides options later)
Update the below parameters as defined below. Other values remain same.
Set name as 'myxmlregistry'
Click on Next
Click on new button in Groups tab
Enter name 'cisusers'
Uncheck 'Combined Role Mapping enabled'
Navigate to myrealm-> Providers->Password Validation
Navigate back to myrealm -> users and groups -> users
Enter 'system' in name
Password is 'ouafadmin'
Update the group member ship as shown below. 'cisusers' should be added in Chosen
Enter 'SYSUSER' in name
And password as 'sysuser00'
Add 'cisusers' in Chosen
Click on Save.
C:\c2m\Oracle\Middleware\Oracle_Home\user_projects\domains\c2m2703_domain\bin
Open 'setDomainEnv.cmd' file
add the following line in the file
set SPLEBASE=C:\c2m\ouaf\C2M2703
Save the file and close it.
Next Go to C:\c2m\Oracle\Middleware\Oracle_Home\user_projects\domains\c2m2703_domain\bin
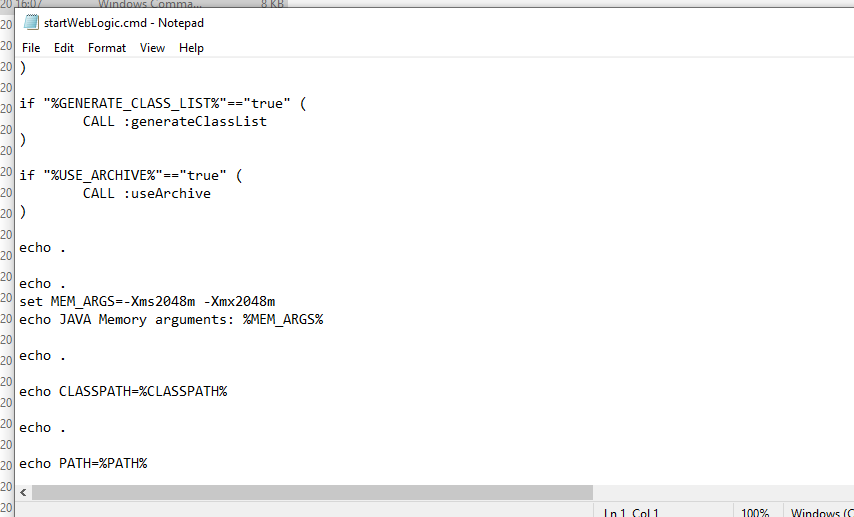
Open 'startWebLogic.cmd' file
Add below line in the file.
set MEM_ARGS=-Xms2048m -Xmx2048m
Save the file and close it.
This increases the assigned RAM memory of Weblogic Admin server to 2GB, this is needed as more memory is needed for deploying ear files of application. You can reset it after deployment has completed.
Next again start the admin server. Follow the steps to do the same
Open a command prompt with ‘Run as Administrator option’
Navigate to your domain location
C:\c2m\Oracle\Middleware\Oracle_Home\user_projects\domains\c2m2703_domain
Enter startWebLogic.cmd
Weblogic server should start up
Verify that the memory allocated on server startup is 2GB
Look for below arguments in the command prompt screen for verifying
Open the server from browser using the link http://localhost:7001/console
Navigate to the domain c2m2703_domain in domain structure on left side
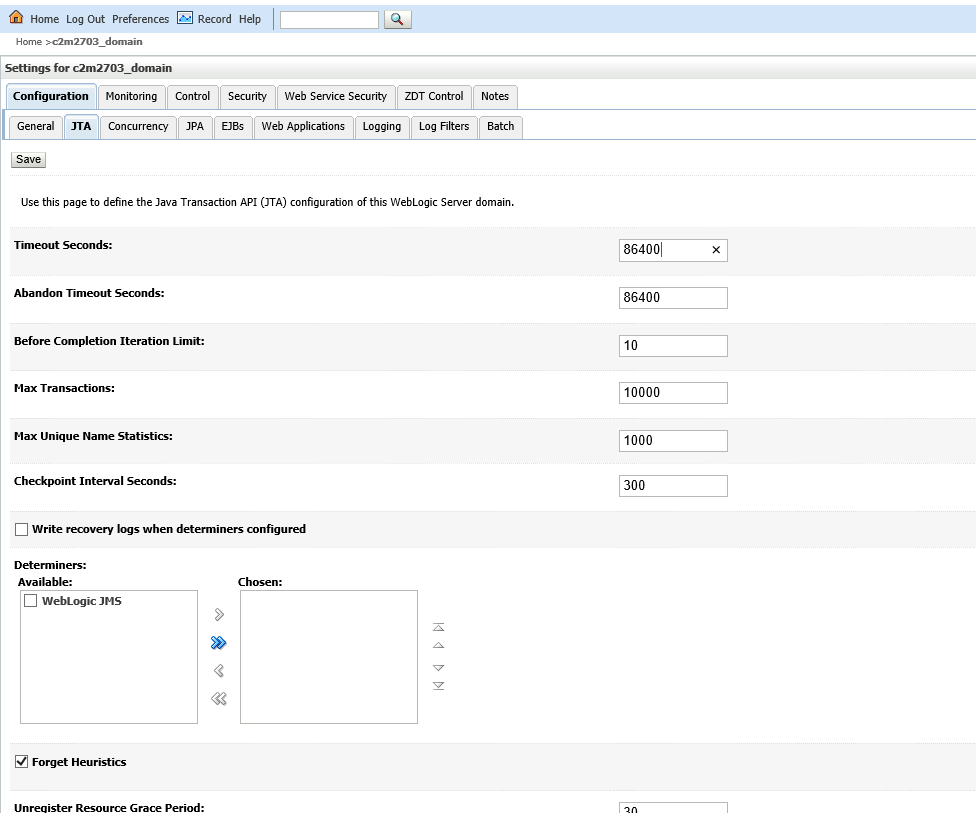
Go to JTA tab
Set the timeout seconds to '86400'. This is needed because SPLWeb deployment takes a lot of time and we don’t want the deployment to timeout.
Click on Install button
Enter the following Path or navigate to following path in Path field
C:\c2m\ouaf\C2M2703\splapp\applications\SPLService.ear
In Source Accessibility select Copy this application onto every target for me
Click on Next button
Select ‘Yes, take me to the deployment’s configuration screen’
Click on Finish button
Enter ‘100’ in deployment order
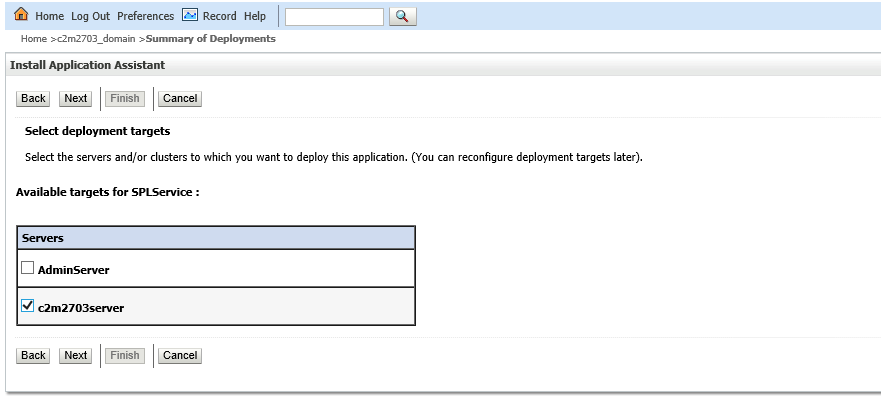
Select target as c2m2703server
Click on Next button
In Source Accessibility select ‘Copy this application onto every target for me’
Click on Next button
Click on Finish button
Help deployment
Do similar steps as earlier ears for ohelp.ear
Put deployment order as 100 for this. Order doesn’t matter for this.
This completes the deployment of application ear files on weblogic.
Now to start the managed server, first start the nodemanager.
To do that open a command prompt with ‘Run as Administrator option’
Navigate to your domain location\bin
C:\c2m\Oracle\Middleware\Oracle_Home\user_projects\domains\c2m2703_domain\bin
Run startNodeManager.cmd
This starts the nodemanager
Verify that the port is set to 5556 for nodemanager
Next navigate to Environment -> Servers
Server will get started up.
You can verify the status of server startup by viewing the log files at following location
C:\c2m\Oracle\Middleware\Oracle_Home\user_projects\domains\c2m2703_domain\servers\c2m2703server\logs
(ORACLE_HOME\user_projects\domains\c2m2703_domain\servers\c2m2703server\logs)
The files c2m2703server.log and c2m2703server.out can be used to check the status of server. This can be used to check if any errors came up in server startup
Alternatively you can also check the framework product logs at following location
C:\c2m\ouaf\C2M2703\logs\system
(SPLEBASE\logs\system)
Once server has started up the state of the server changes to running.
You can login to your OUAF application (C2M) by entering the following url in your brower
https://localhost:6501/ouaf/loginPage.jsp
And 'sysuser00' in password
If everything has been proper you application should open up
This completes the installation of C2M application
Try it out. Let me know in case of any queries.
Part II - Download and Installation of C2M product
Part III - Deployment of C2M product in Weblogic using Native Installation
Part III - Deployment of C2M product in Weblogic using Native Installation
This blog covers steps for Deployment of C2M product in Weblogic using Native Installation
(Kindly also refer my latest blog for using WLST to do native installation on weblogic. It helps to reduce the time taken as well as reduces any errors. Link to blog: Native installation using WLST)
I am assuming that you have already installed Weblogic software by following the instructions in Part I. These steps are subsequent to that.
Navigate to Oracle Weblogic Home
C:\c2m\Oracle\Middleware\Oracle_Home\oracle_common\common\binRun config.cmd with ‘Run as administrator’ option
Below configuration Wizard screen opens up.
Select Create a new domain
Update the domain location. Instead of base_domain, update it to c2m2703_domain
You can give any desired name for domain name.
Click on Next
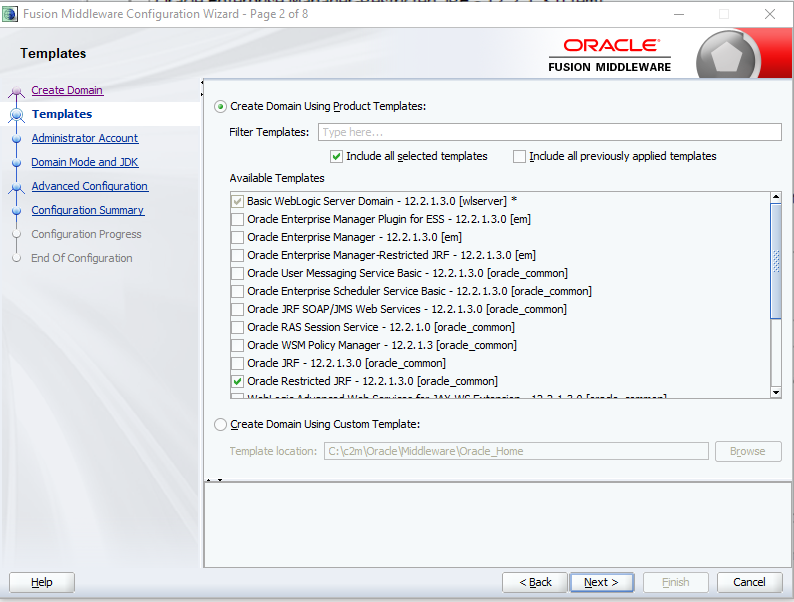
In next step,
Basic Weblogic Server Domain would already be selected
Select Oracle Restricted JRF also [If this is not selected your application help screen (ohelp) won’t work]
Click on Next
Click on Next
In next step,
Basic Weblogic Server Domain would already be selected
Select Oracle Restricted JRF also [If this is not selected your application help screen (ohelp) won’t work]
Click on Next
In Administrator account screen
Enter username as 'weblogic'
Enter a password for your weblogic admin server
Click on next
Select Development

Select JDK that maps to your installed jdk earlier
Click on Next

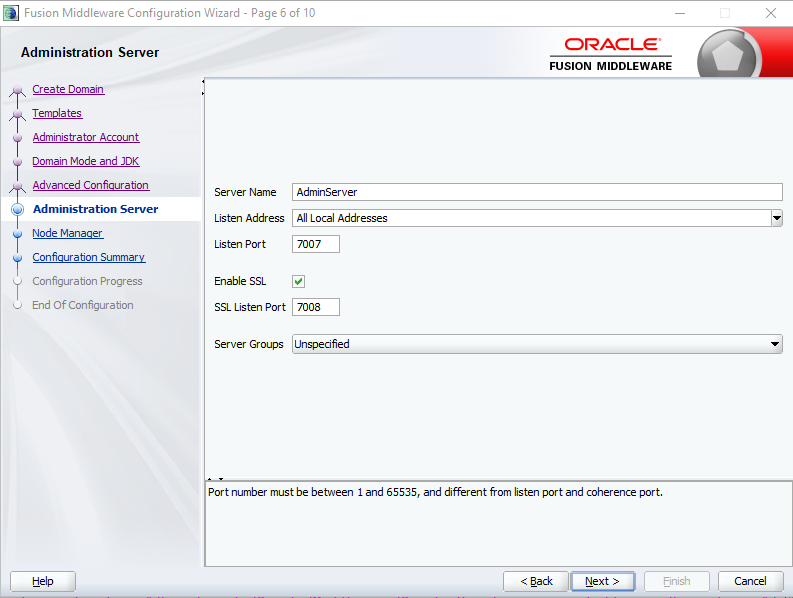
On next screen,
Select Administration Server and Node Manager
Set Server name as AdminServer

You can name it as myserver also
Set listen port to 7001
Enable SSL
Set SSL port to 7002
Next on Node manager screen
Select per domain Default location
Enter same username and password as entered on administrator screen
Click on next

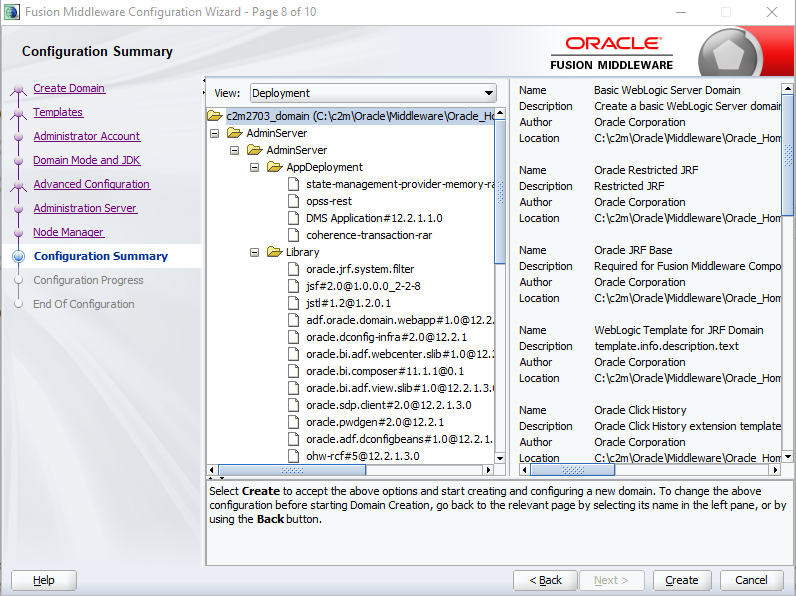
Next screen opens up
Click on Create button
Configuration process is visible. Once it is completed to 100%, click on Next.

As seen the new weblogic domain creation is completed.
The link for logging to admin server is visible.
Click on Finish and complete the configuration.

Navigate to your domain location
C:\c2m\Oracle\Middleware\Oracle_Home\user_projects\domains\c2m2703_domain
Enter startWebLogic.cmd
Weblogic server should start up

Wait till you see the link Server state changed to RUNNING
Next open a browser window and enter you weblogic admin server link
http://localhost:7001/console
Enter username and password as defined in the administrator domain configuration earlier


Click on New button.
Enter c2m2703mac in name field

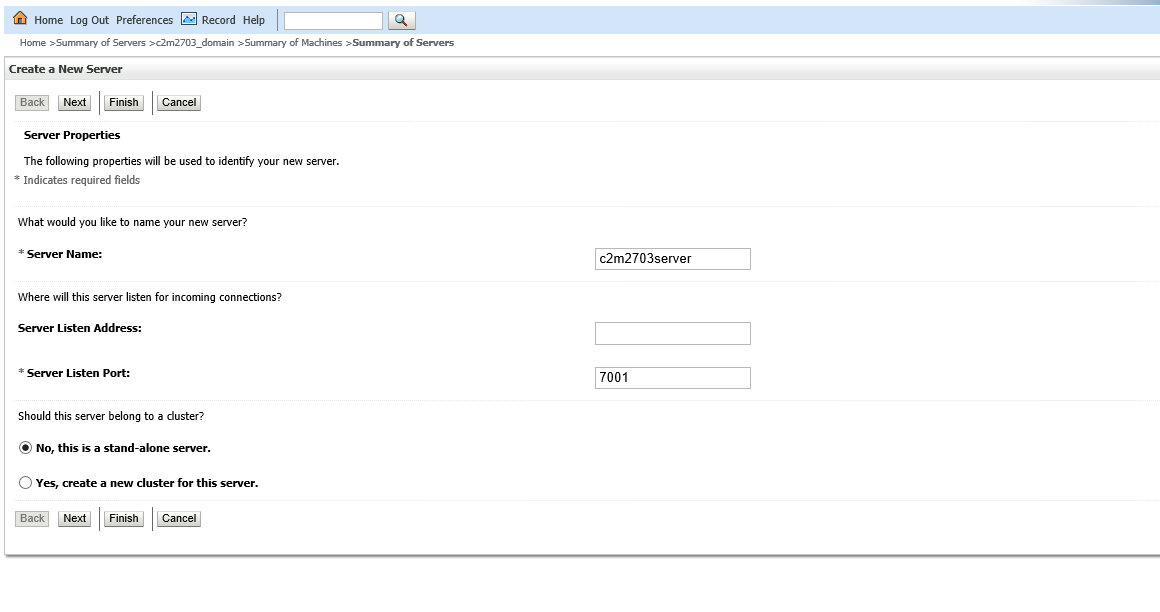
Navigate to Servers and Click on New button
Click on Next

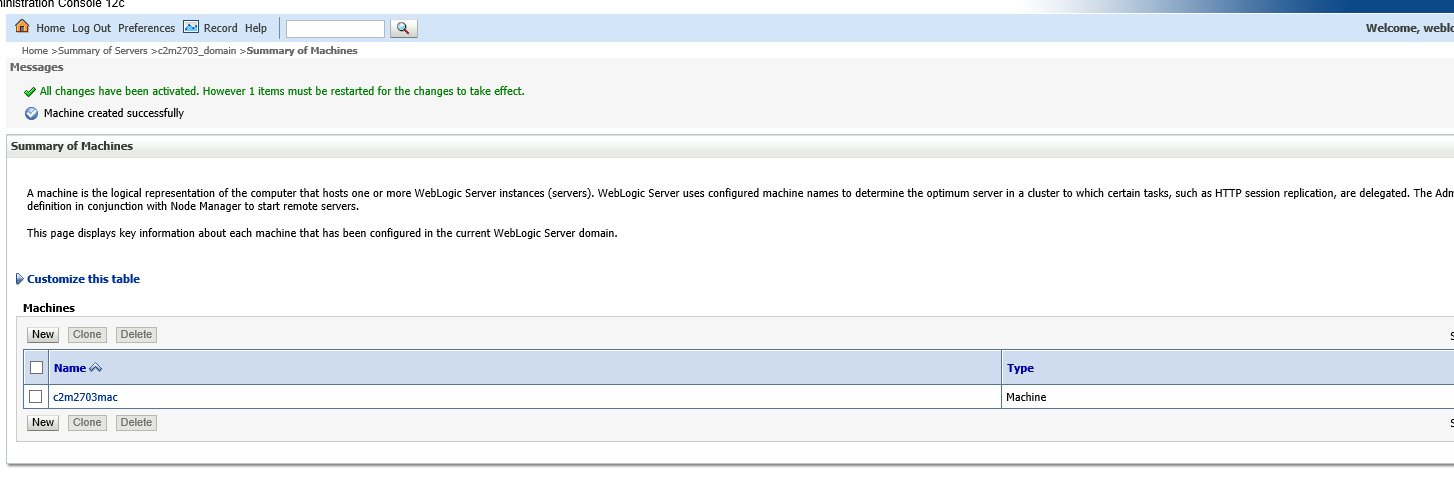
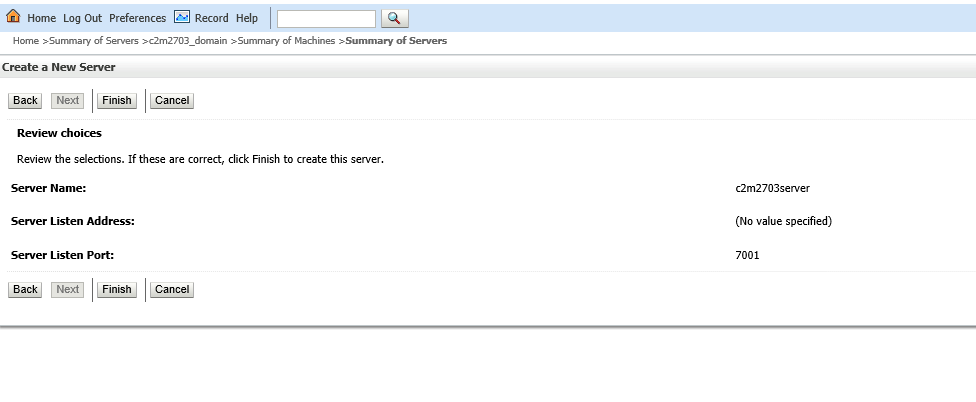
Click on Finish
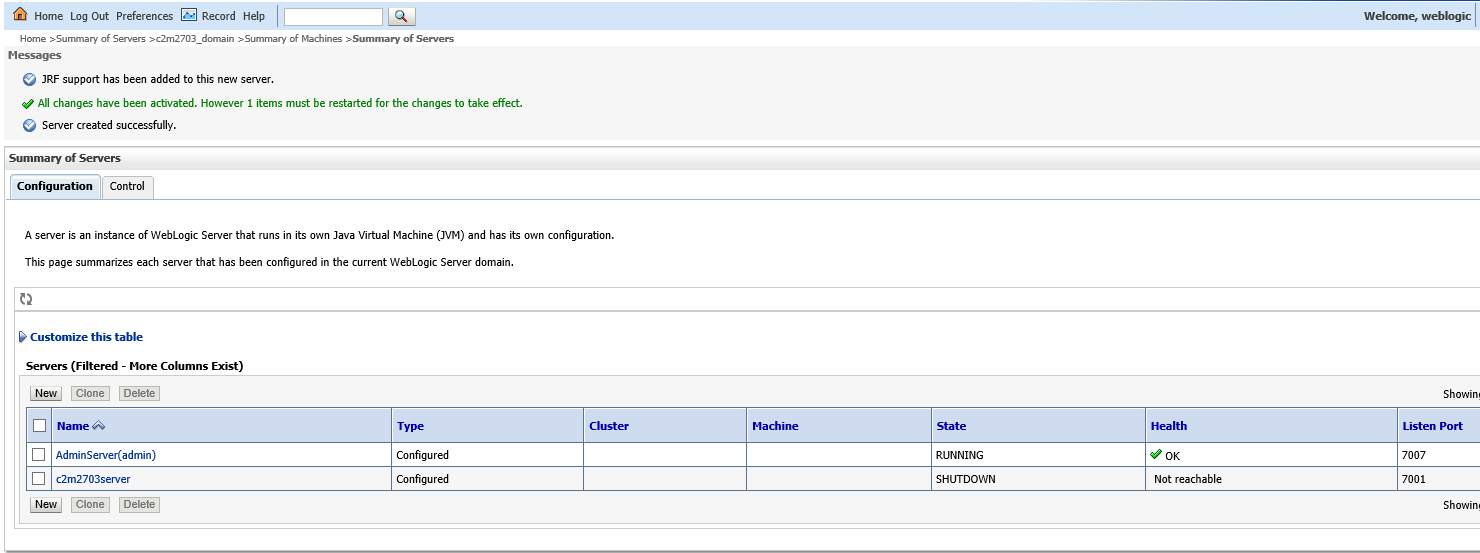
c2m2703server is created and visible. Click on the server name link
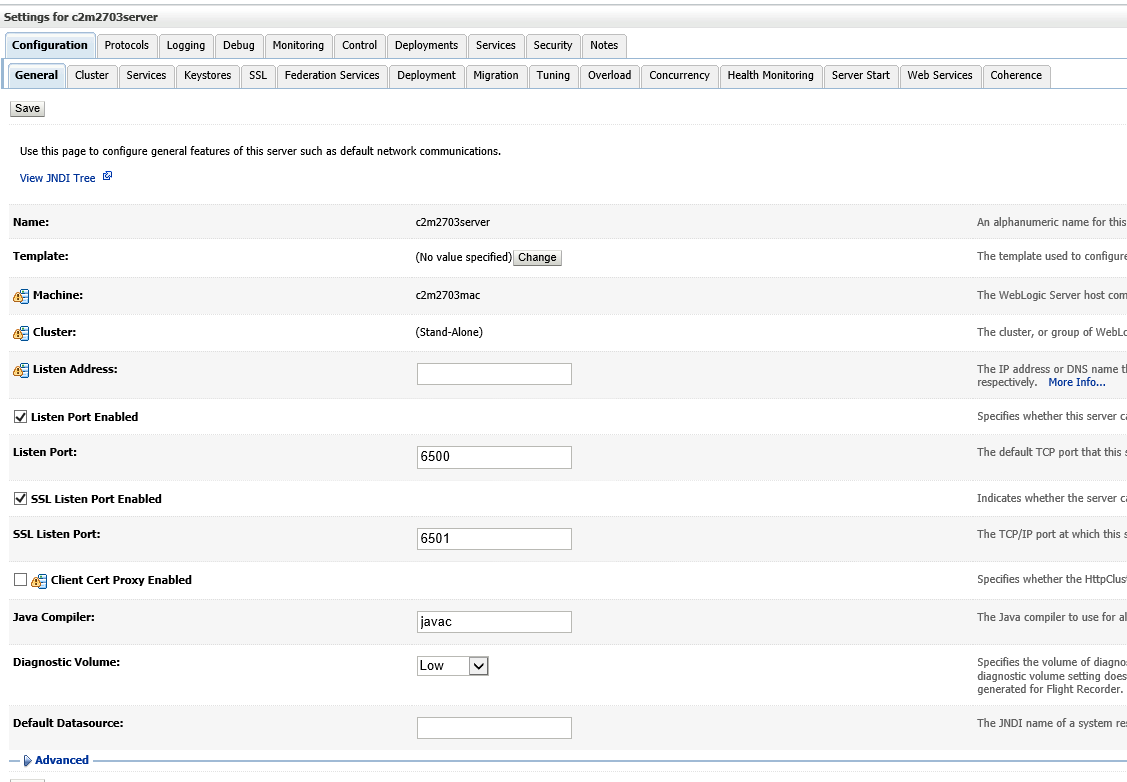
Below configuration screen opens up
Select Machine as c2m703mac
Set Listen port as 6500
SSL port as 6501

Navigate to Server start tab
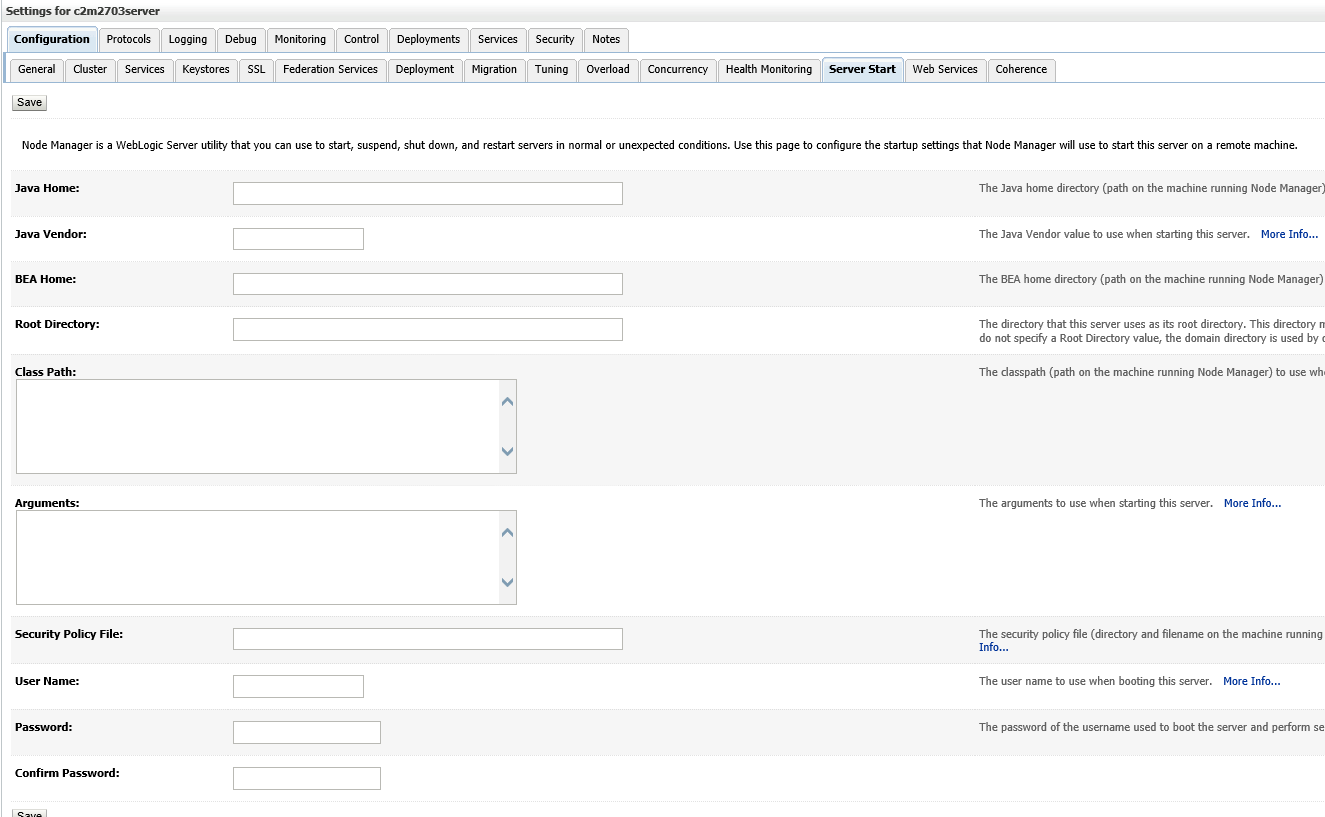
Set the following values in classpath. Put in single line. Don't use newline.
C:\c2m\ouaf\C2M2703\splapp\standalone\lib\xalan-mod-2.7.1.jar;C:\c2m\ouaf\C2M2703\splapp\standalone\lib\serializer-2.7.1.jar;C:\c2m\ouaf\C2M2703\splapp\standalone\lib\antlr-2.7.6.jar;C:\c2m\Oracle\Middleware\Oracle_Home\wlserver\server\lib\weblogic_sp.jar; C:\c2m\Oracle\Middleware\Oracle_Home\wlserver\server\lib\weblogic.jar
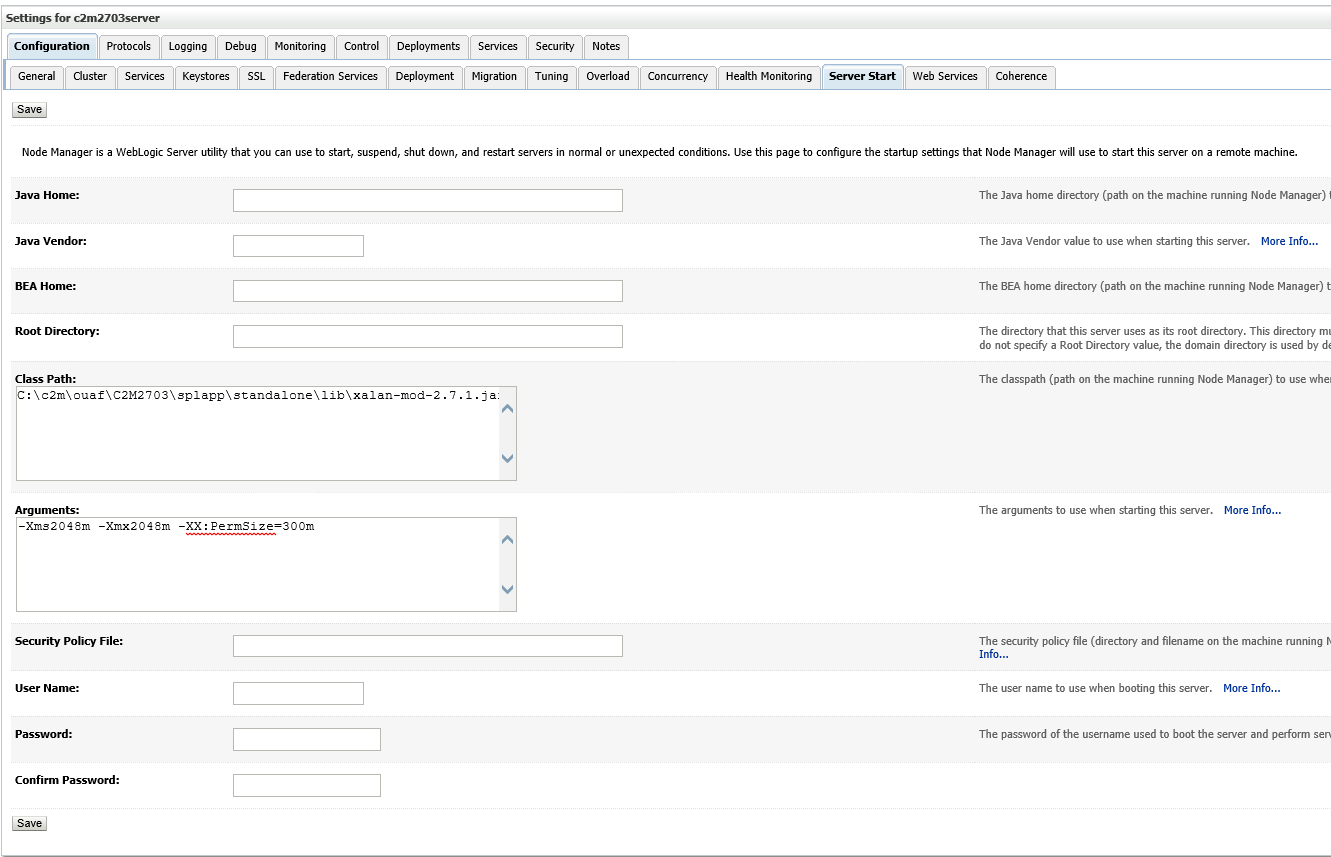
Set below value in arguments field. (We will see how to set this using setUserOverrides options later)
-Xms2048m -Xmx2048m -XX:PermSize=300m
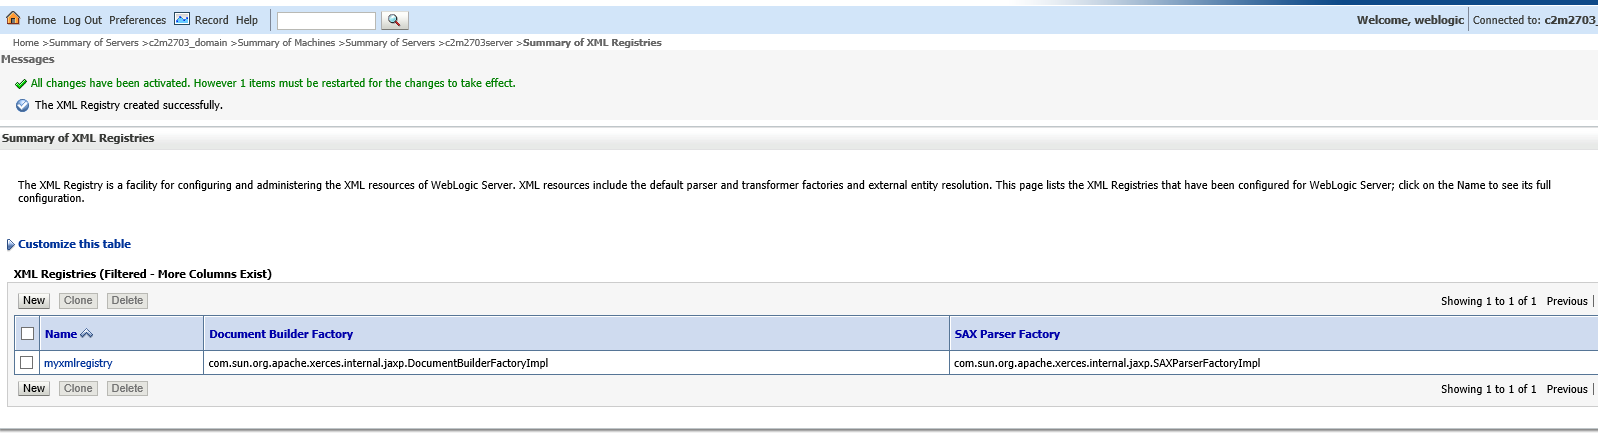
Navigate to XML Registries
Note*: For C2M 2.8.0.0 installation, set classpath to C:\c2m\ouaf\C2M2800\splapp\standalone\lib\antlr-2.7.7.jar;C:\c2m\weblogic\12.2.1.4.0\Oracle\Middleware\Oracle_Home\wlserver\server\lib\weblogic_sp.jar;C:\c2m\weblogic\12.2.1.4.0\Oracle\Middleware\Oracle_Home\wlserver\server\lib\weblogic.jar
Also set heap size to 3072 for C2M 2.8.0.0
-Xms3072m -Xmx3072m -XX:PermSize=512m
Navigate to XML Registries

Set name as 'myxmlregistry'
Click on Next
Select the server as c2m2703server. And click on Finish button.

Xml registry is created

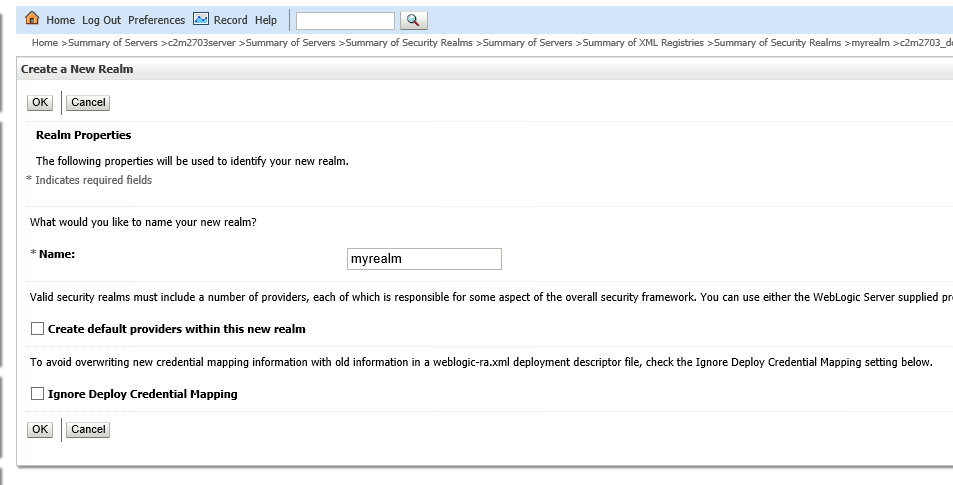
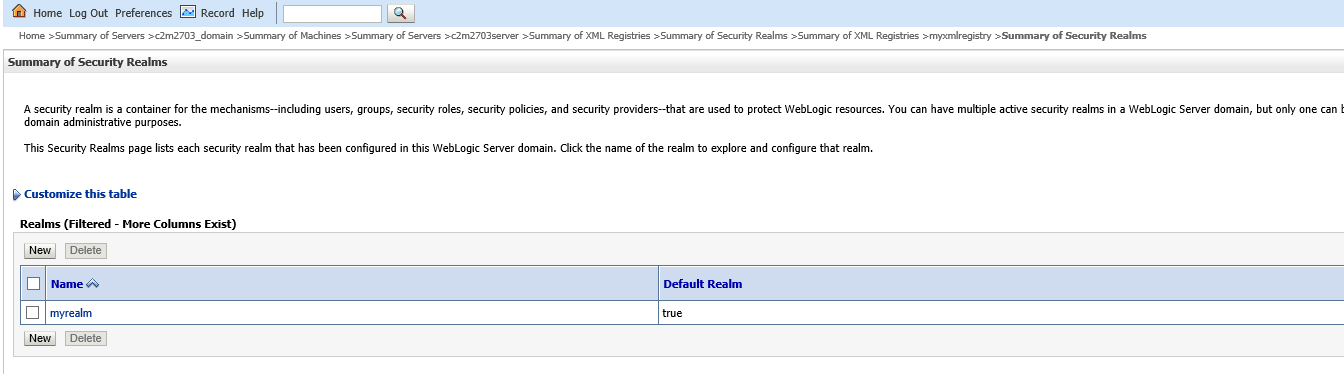
Next navigate to Security Realms and click on New button.
Create a new realm ‘myrealm’

Click on myrealm and open it
Navigate to Users and Group tab
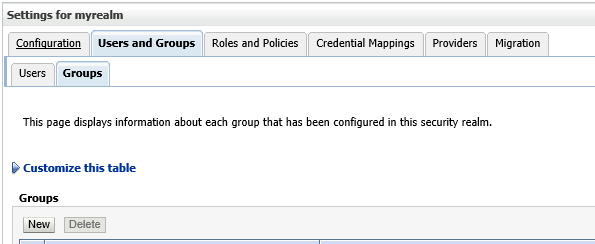
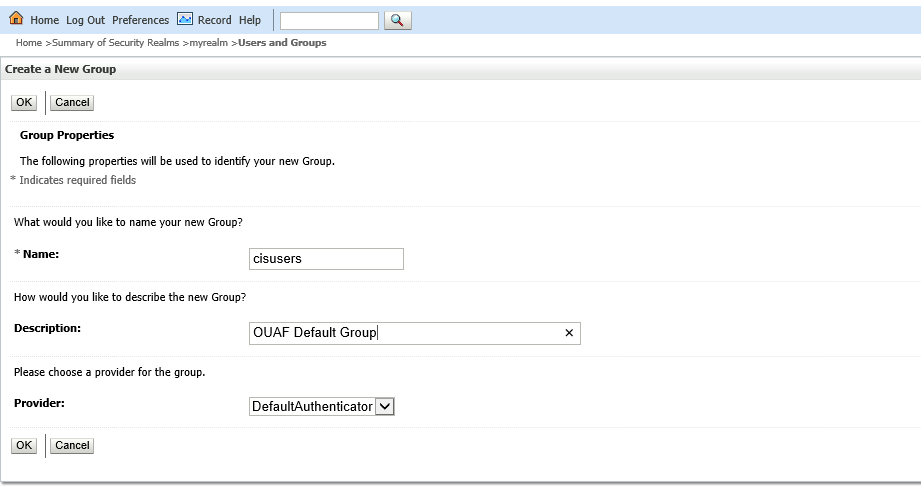
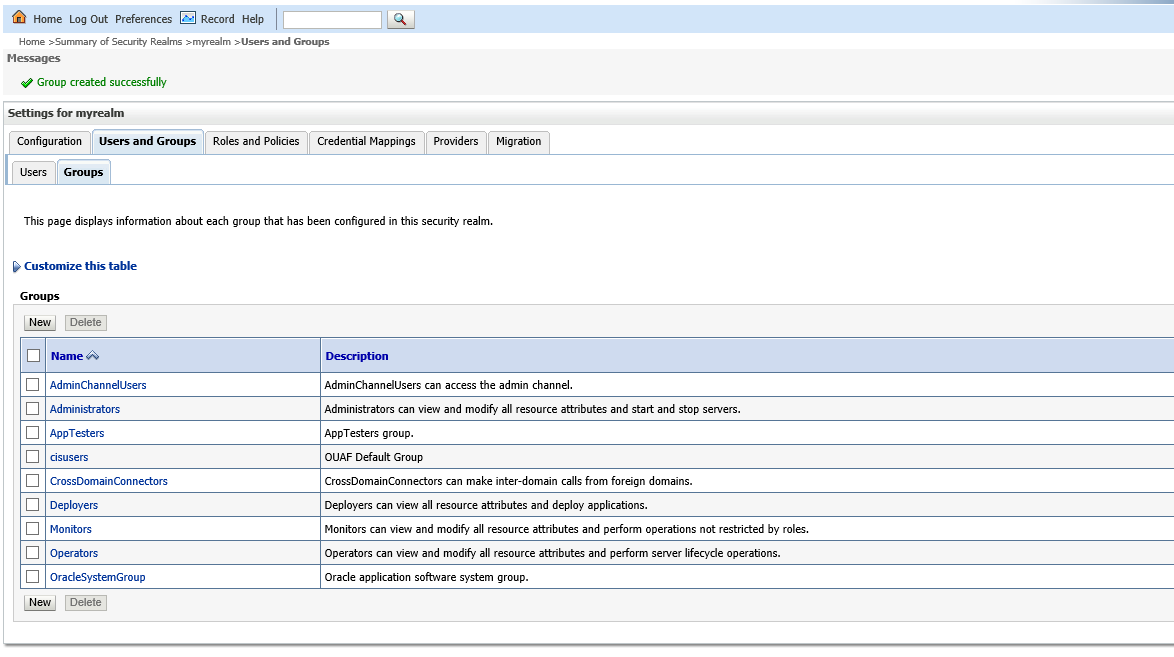
Click on new button in Groups tab
Enter name 'cisusers'
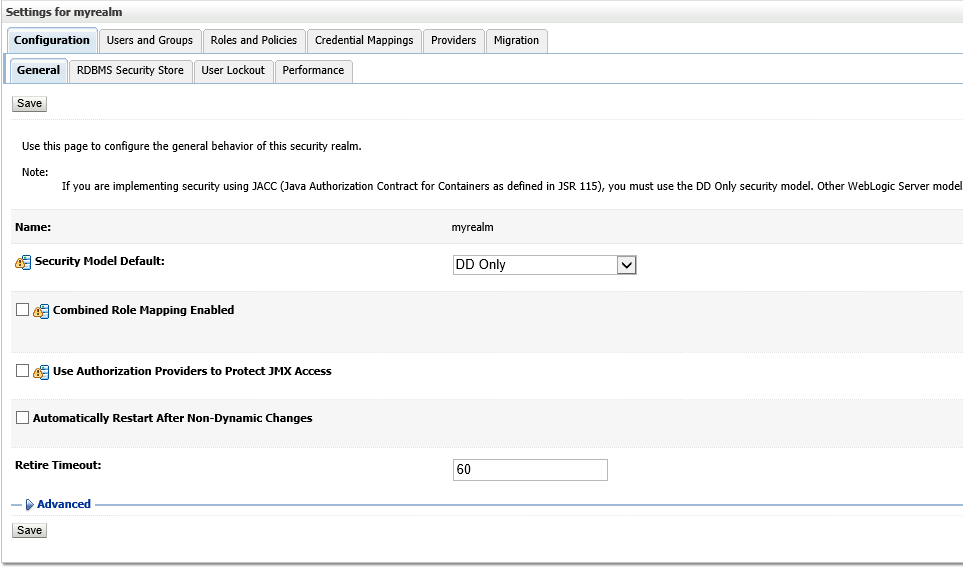
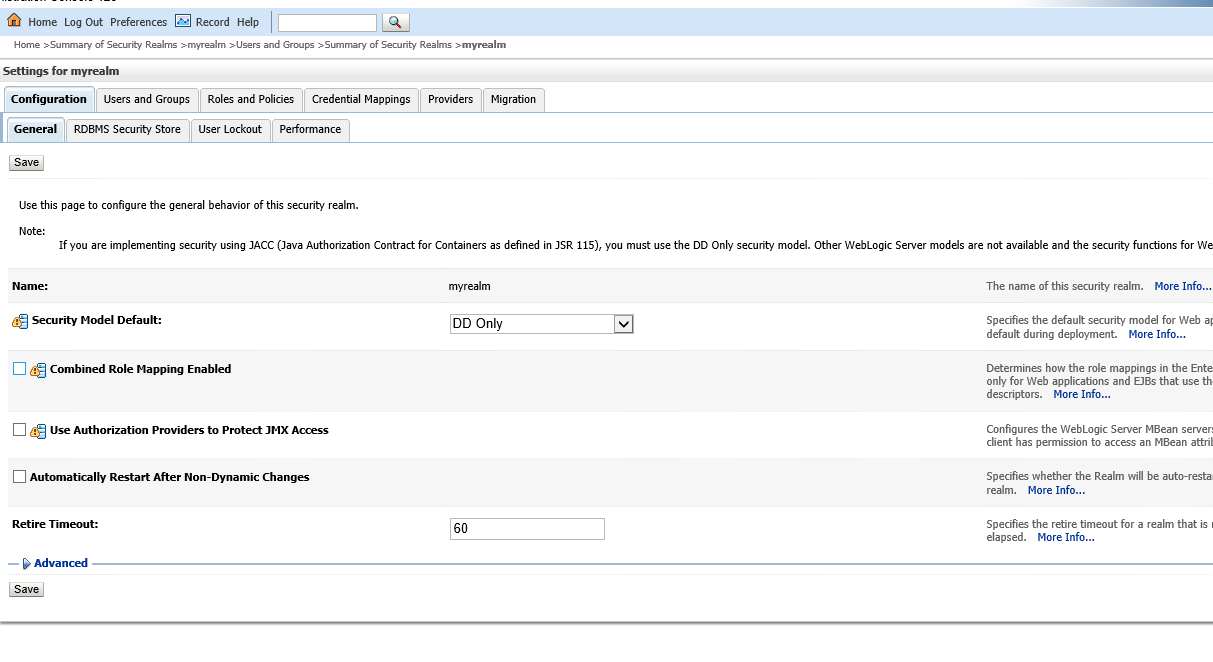
Navigate to Configuration tab
Uncheck 'Combined Role Mapping enabled'
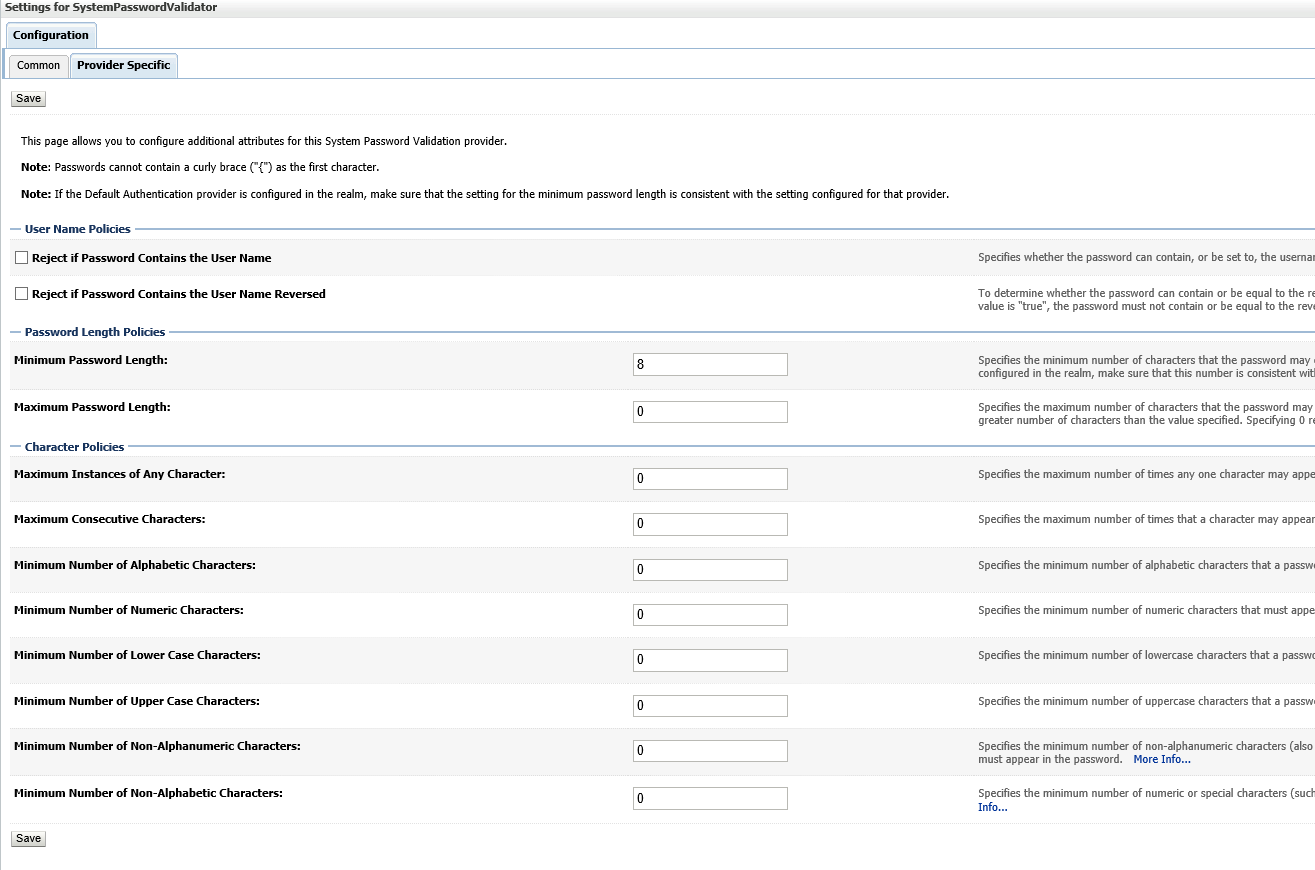
Navigate to myrealm-> Providers->Password Validation
Update minimum number of non-Alphabetic characters to 0

Navigate back to myrealm -> users and groups -> users
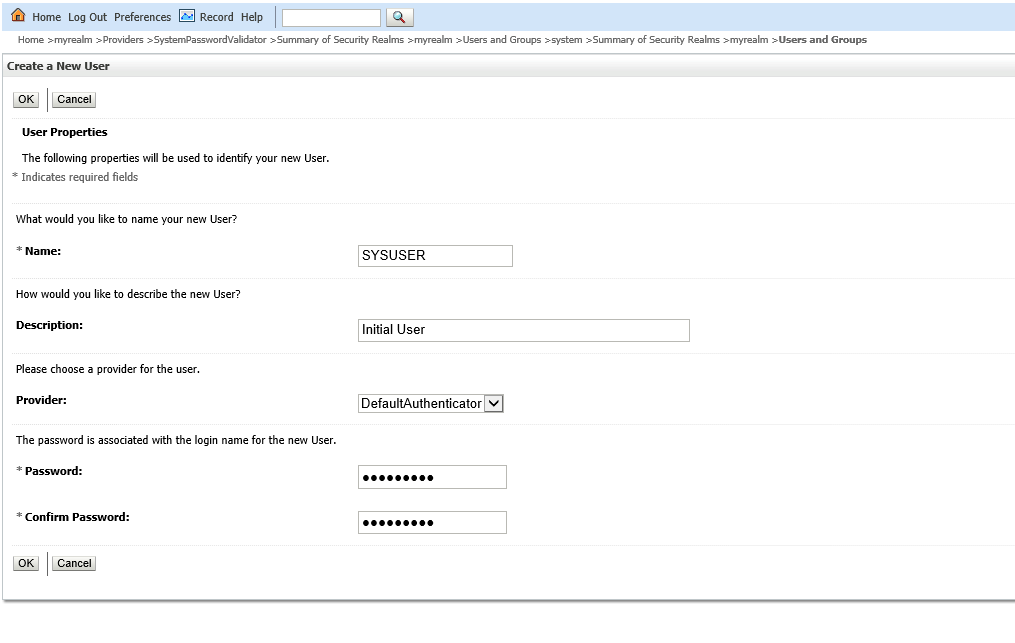
Click on new button
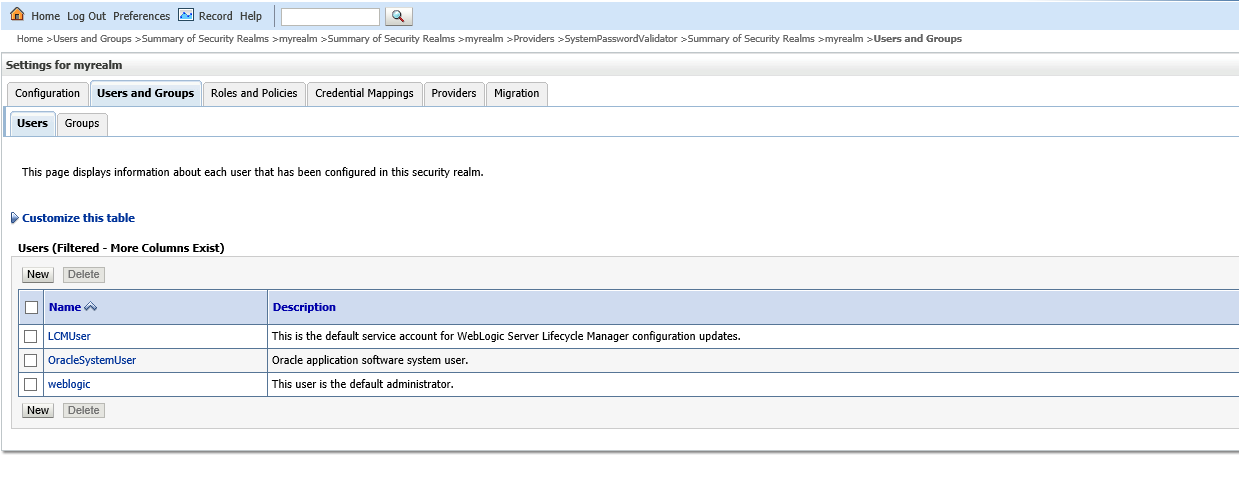
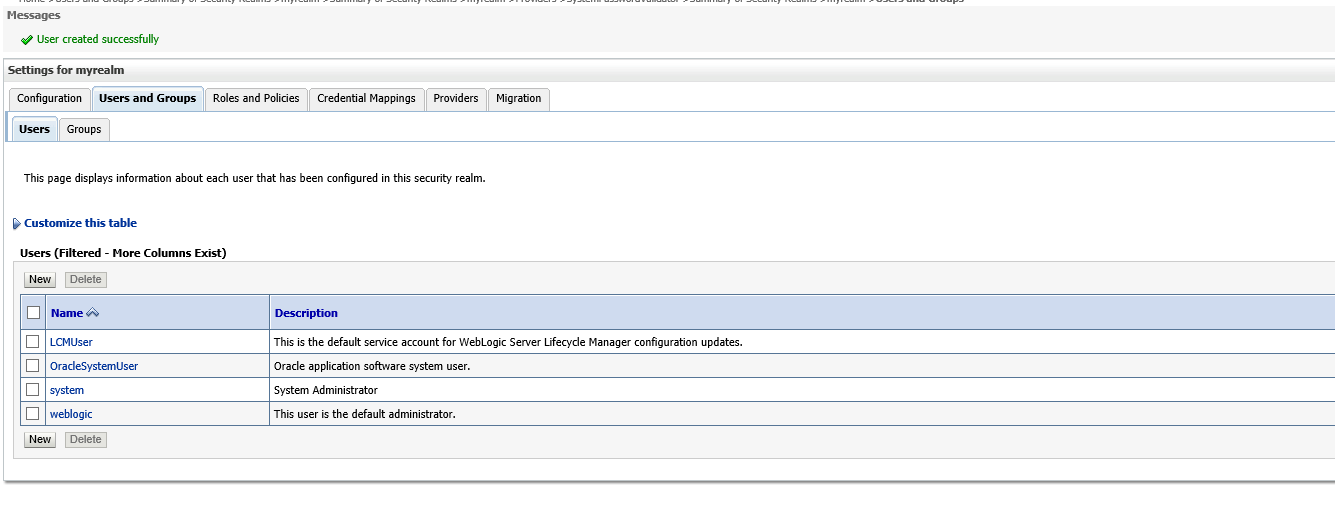
Enter 'system' in name
Password is 'ouafadmin'
Note* - This password has to be same as the one set during the application installation for 'WebLogic JNDI Password' parameter (Covered in Part 2 of blog series)

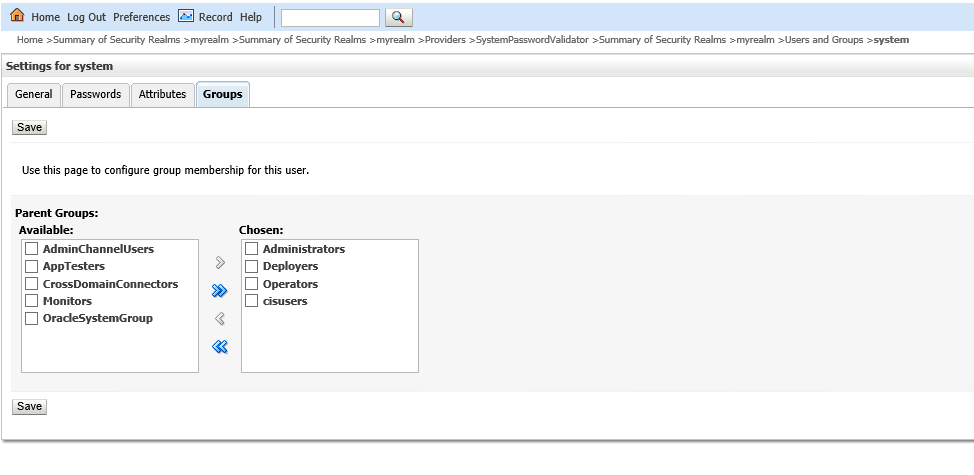
Click on 'system' user
Click on Groups tab
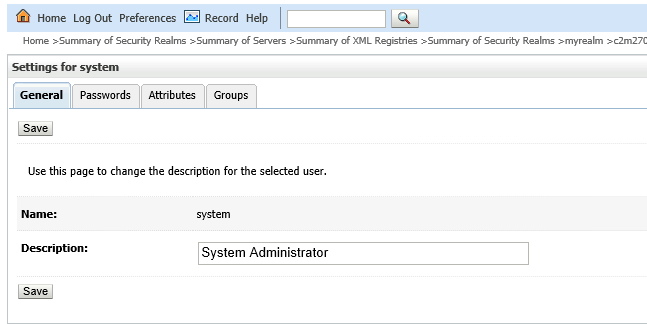
Update the group member ship as shown below. 'cisusers' should be added in Chosen
Click on Save button
Navigate back to myrealm -> Users and Groups -> Users

Click on New button

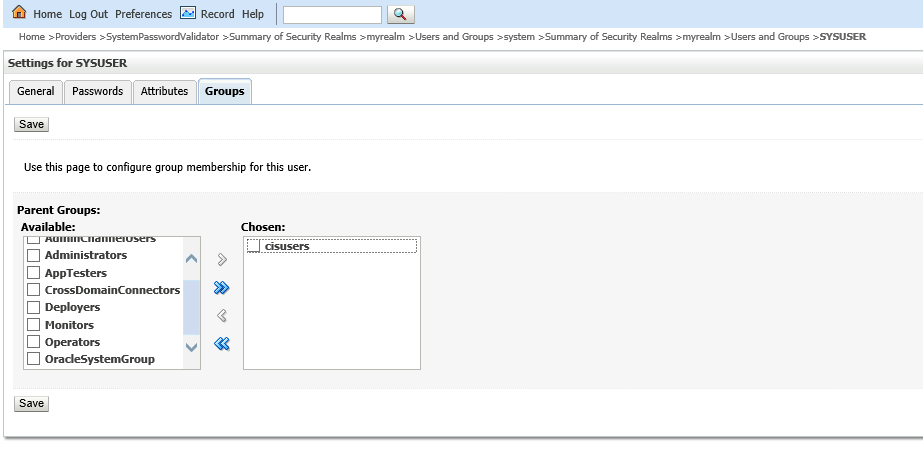
Enter 'SYSUSER' in name
And password as 'sysuser00'
Once user is created. Open the user and navigate to Groups tab
Add 'cisusers' in Chosen
Click on Save.
Now close the admin server. You can just close the command prompt window.

Set SPLBASE
Navigate to below locationC:\c2m\Oracle\Middleware\Oracle_Home\user_projects\domains\c2m2703_domain\bin
Open 'setDomainEnv.cmd' file
add the following line in the file
set SPLEBASE=C:\c2m\ouaf\C2M2703
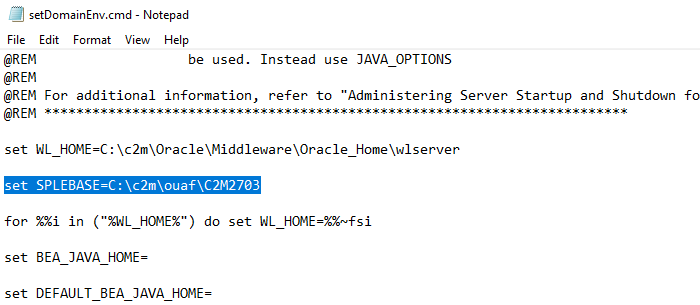
Save the file and close it.
Next Go to C:\c2m\Oracle\Middleware\Oracle_Home\user_projects\domains\c2m2703_domain\bin
Open 'startWebLogic.cmd' file
Add below line in the file.
set MEM_ARGS=-Xms2048m -Xmx2048m
Save the file and close it.
This increases the assigned RAM memory of Weblogic Admin server to 2GB, this is needed as more memory is needed for deploying ear files of application. You can reset it after deployment has completed.
Next again start the admin server. Follow the steps to do the same
Open a command prompt with ‘Run as Administrator option’
Navigate to your domain location
C:\c2m\Oracle\Middleware\Oracle_Home\user_projects\domains\c2m2703_domain
Enter startWebLogic.cmd
Weblogic server should start up
Verify that the memory allocated on server startup is 2GB
Look for below arguments in the command prompt screen for verifying
Open the server from browser using the link http://localhost:7001/console
Navigate to the domain c2m2703_domain in domain structure on left side

Go to JTA tab
Set the timeout seconds to '86400'. This is needed because SPLWeb deployment takes a lot of time and we don’t want the deployment to timeout.
Next navigate to Deployments screen from domain structure
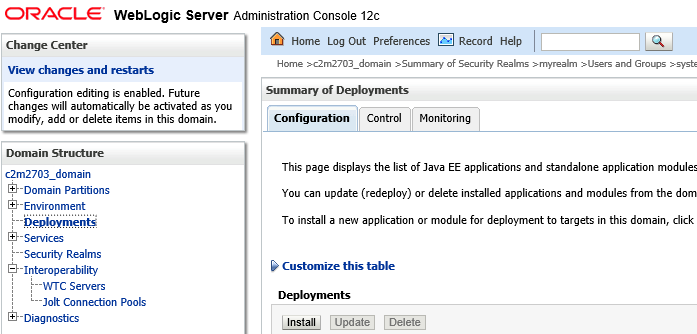
Click on Install button
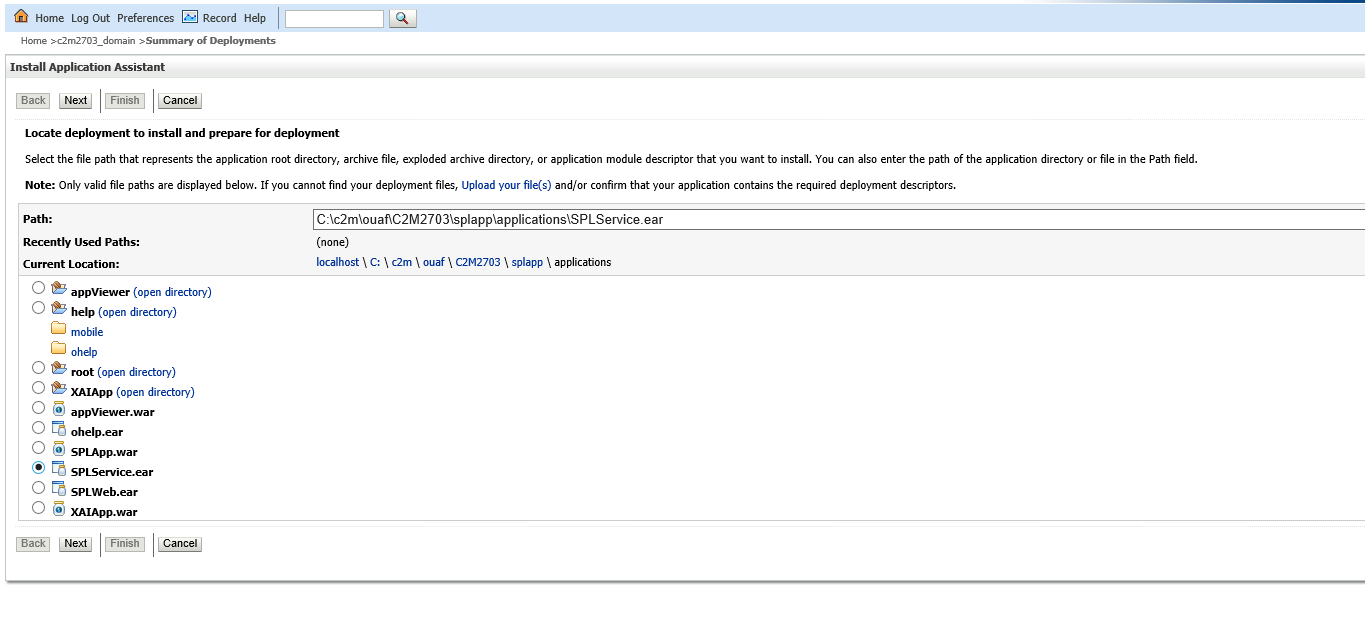
Enter the following Path or navigate to following path in Path field
C:\c2m\ouaf\C2M2703\splapp\applications\SPLService.ear
Click on Next button
Select c2m2703server in targets and click on Next

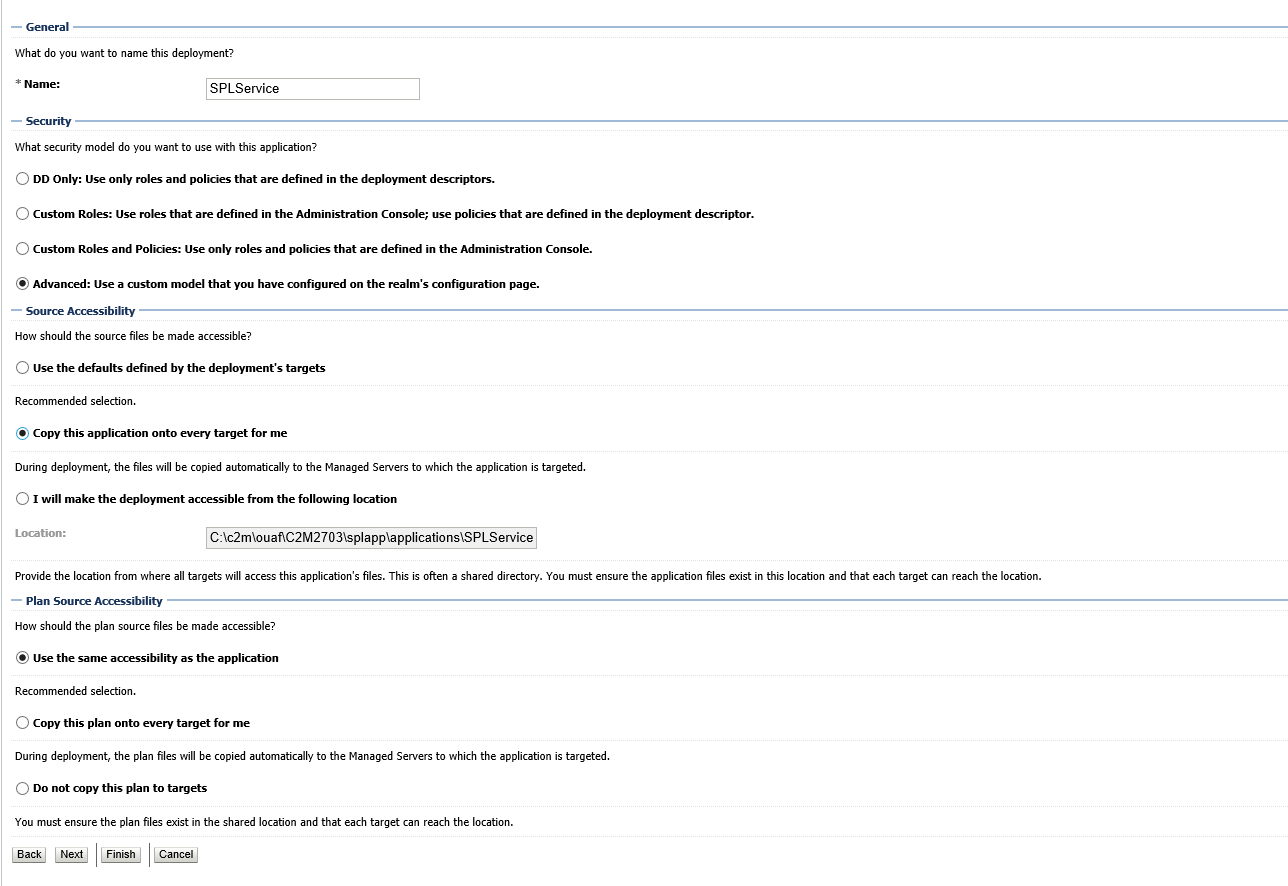
Enter 'SPLService' in Name field
In Source Accessibility select Copy this application onto every target for me
Click on Next button
Select ‘Yes, take me to the deployment’s configuration screen’
Click on Finish button
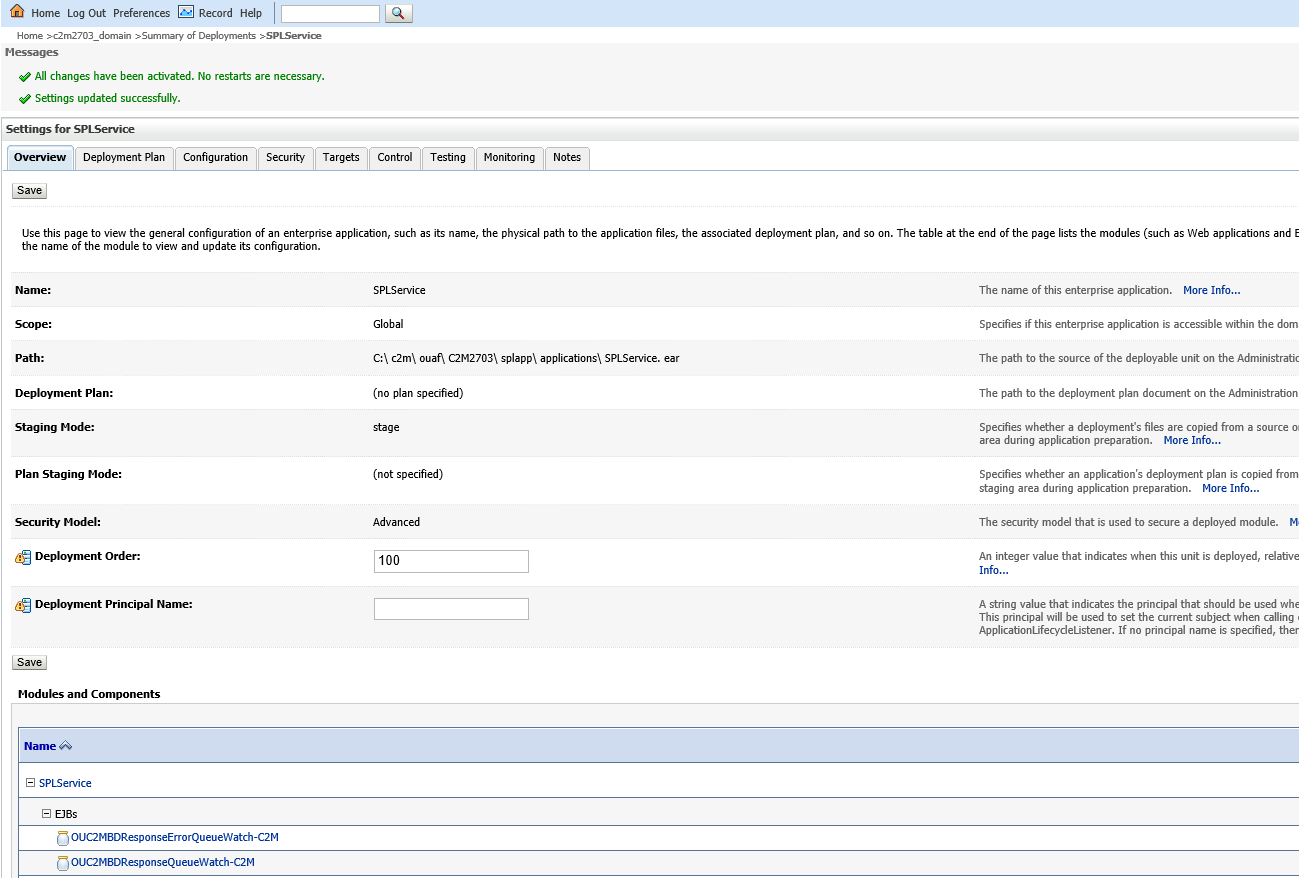
Once deployment is complete

Enter ‘100’ in deployment order
This completes deployment of 'SPLService'

Deployment of SPLWeb
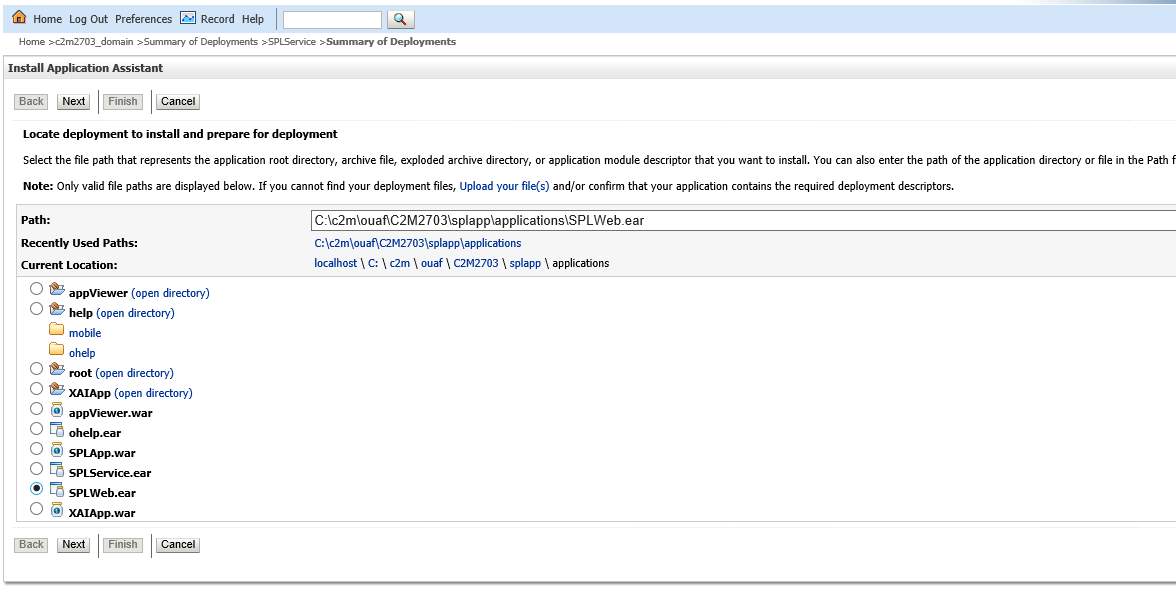
Again go to deployments and click on Install button
Put C:\c2m\ouaf\C2M2703\splapp\applications in Path field
Select 'SPLWeb.ear'
Click on Next button
This step will take a lot of time (around one hour)
On next screen select ‘Install this deployment as an application’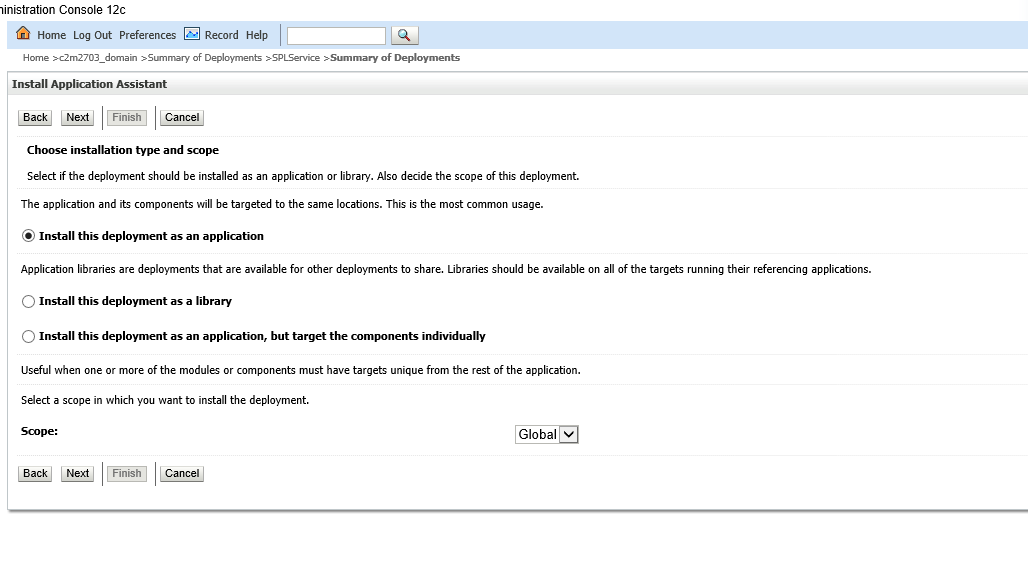
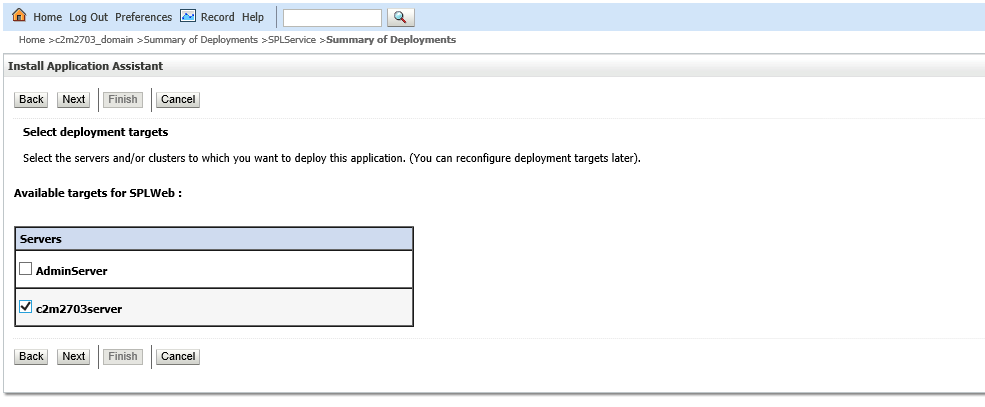
Select target as c2m2703server
Click on Next button
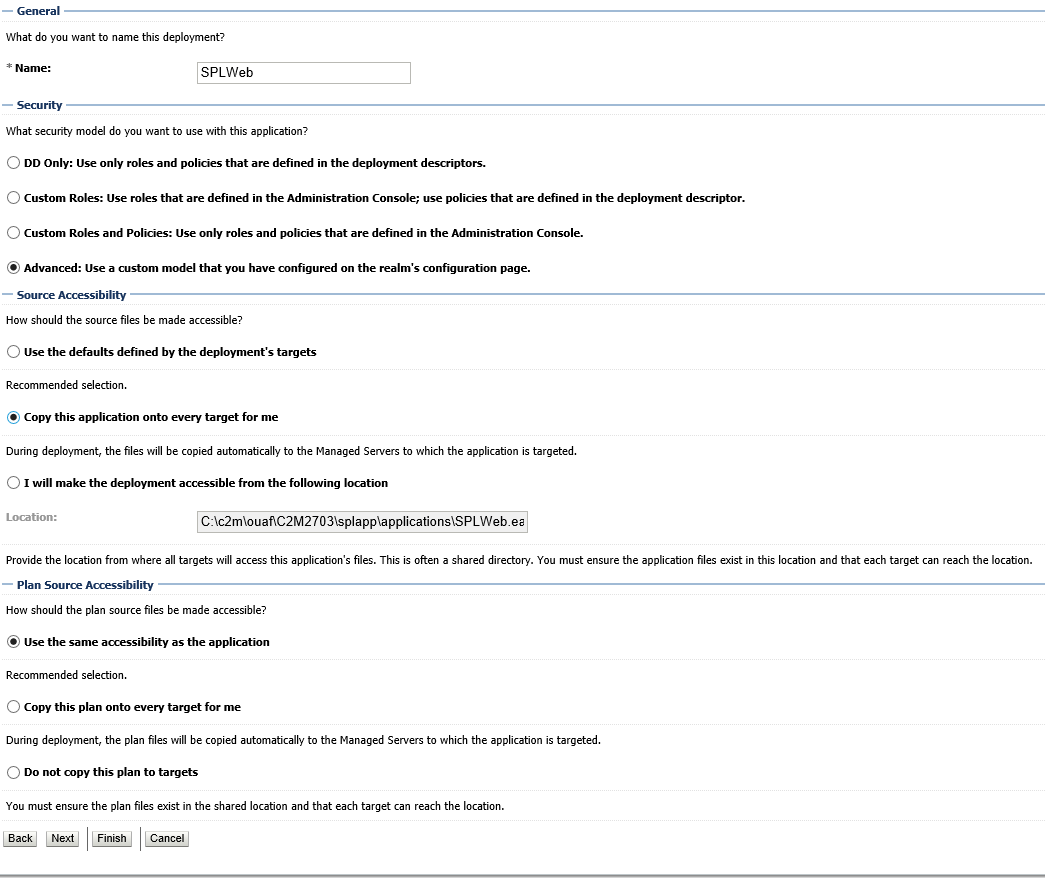
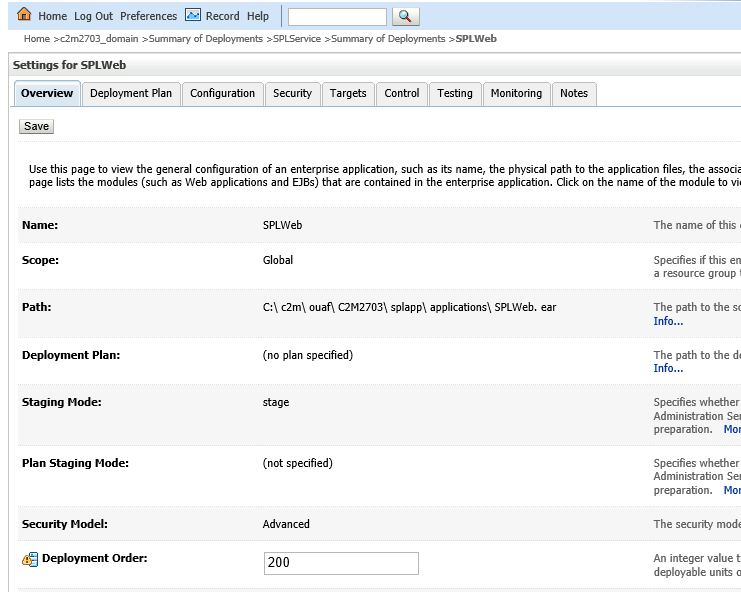
Enter name as 'SPLWeb'
In Source Accessibility select ‘Copy this application onto every target for me’
Click on Next button
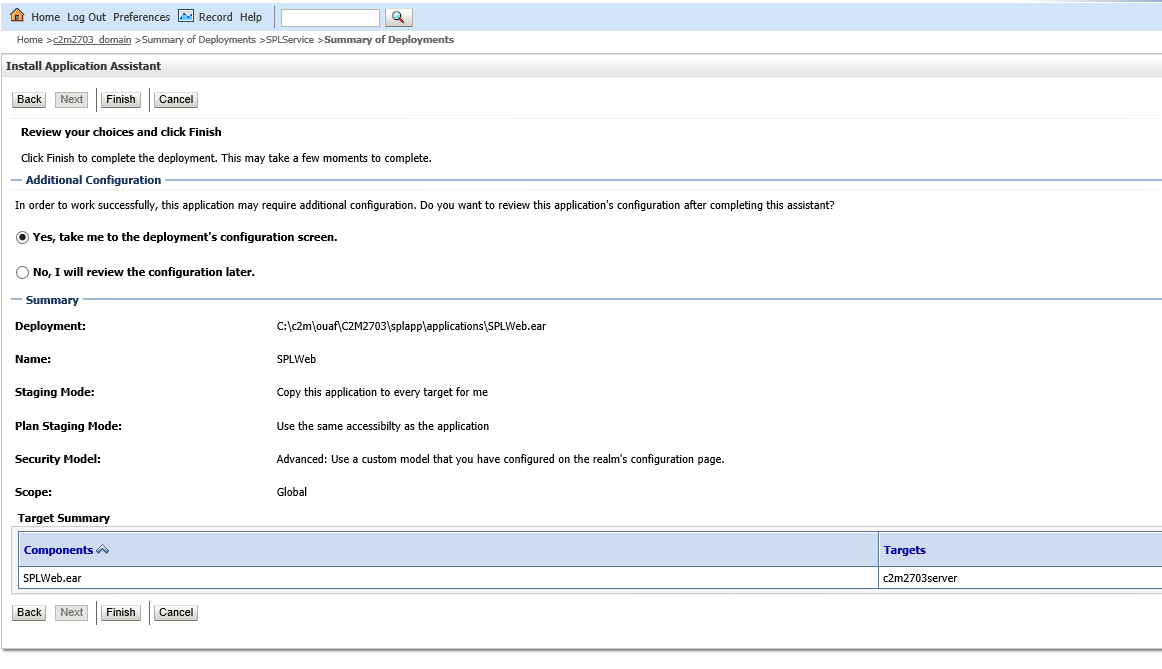
Select ‘Yes, take me to the deployment’s configuration screen’
Click on Finish button
Enter ‘200’ in the deployment order
Help deployment
Do similar steps as earlier ears for ohelp.ear
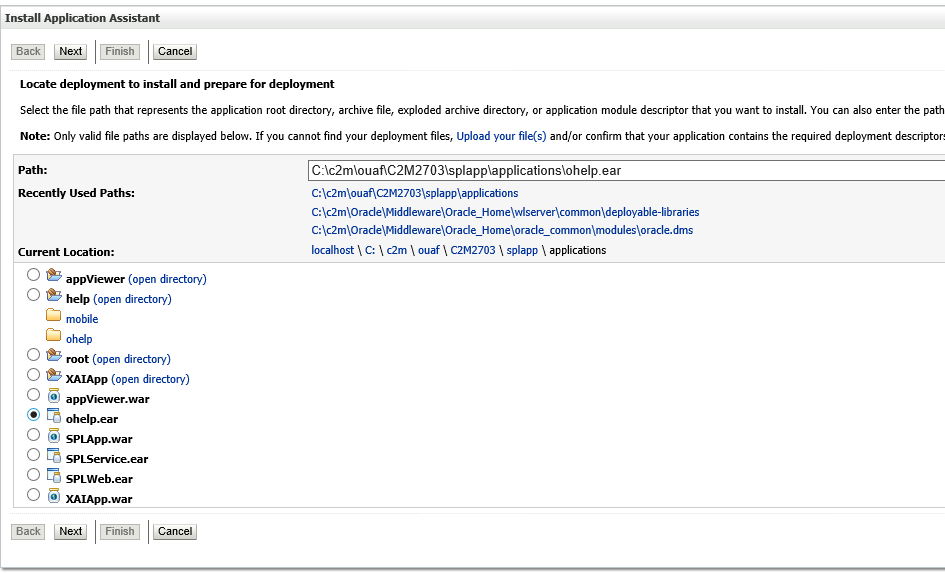
Put deployment order as 100 for this. Order doesn’t matter for this.
This completes the deployment of application ear files on weblogic.
Starting C2M managed server
Now to start the managed server, first start the nodemanager.
To do that open a command prompt with ‘Run as Administrator option’
Navigate to your domain location\bin
C:\c2m\Oracle\Middleware\Oracle_Home\user_projects\domains\c2m2703_domain\bin
Run startNodeManager.cmd
This starts the nodemanager
Verify that the port is set to 5556 for nodemanager

Next navigate to Environment -> Servers
Go to Control tab
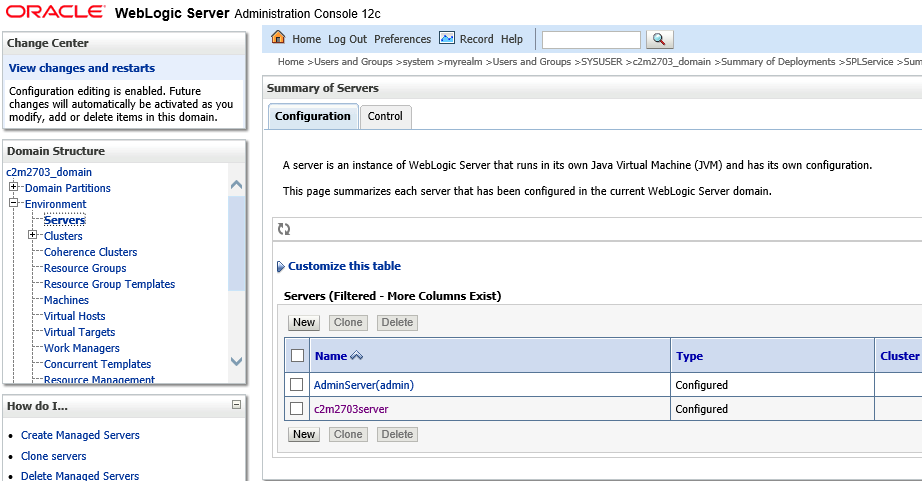
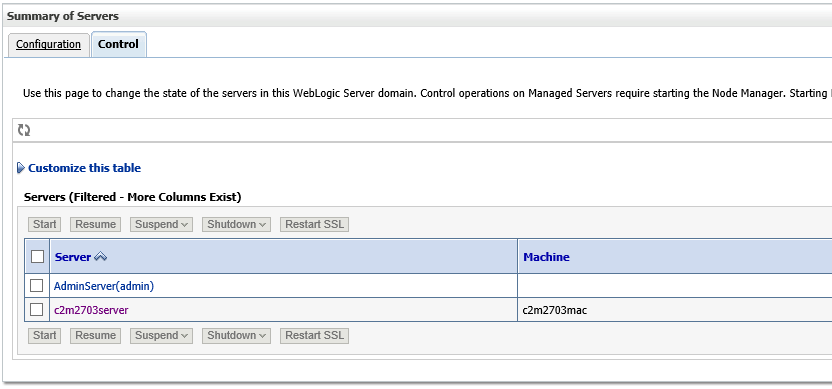
Select c2m2703server and click on start
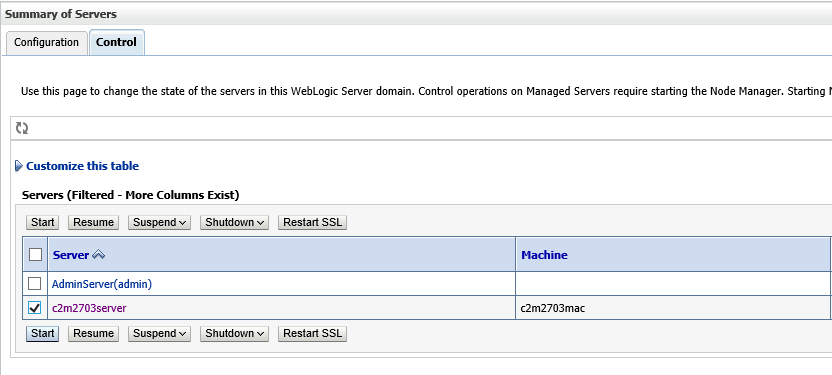
Server will get started up.
You can verify the status of server startup by viewing the log files at following location
C:\c2m\Oracle\Middleware\Oracle_Home\user_projects\domains\c2m2703_domain\servers\c2m2703server\logs
(ORACLE_HOME\user_projects\domains\c2m2703_domain\servers\c2m2703server\logs)
The files c2m2703server.log and c2m2703server.out can be used to check the status of server. This can be used to check if any errors came up in server startup
Alternatively you can also check the framework product logs at following location
C:\c2m\ouaf\C2M2703\logs\system
(SPLEBASE\logs\system)
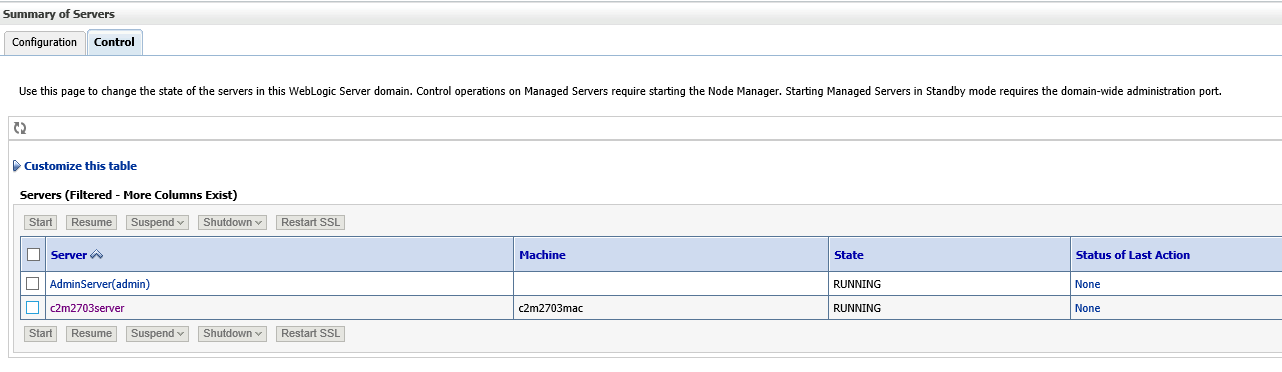
Once server has started up the state of the server changes to running.
You can login to your OUAF application (C2M) by entering the following url in your brower
https://localhost:6501/ouaf/loginPage.jsp
Enter 'SYSUSER' in userid
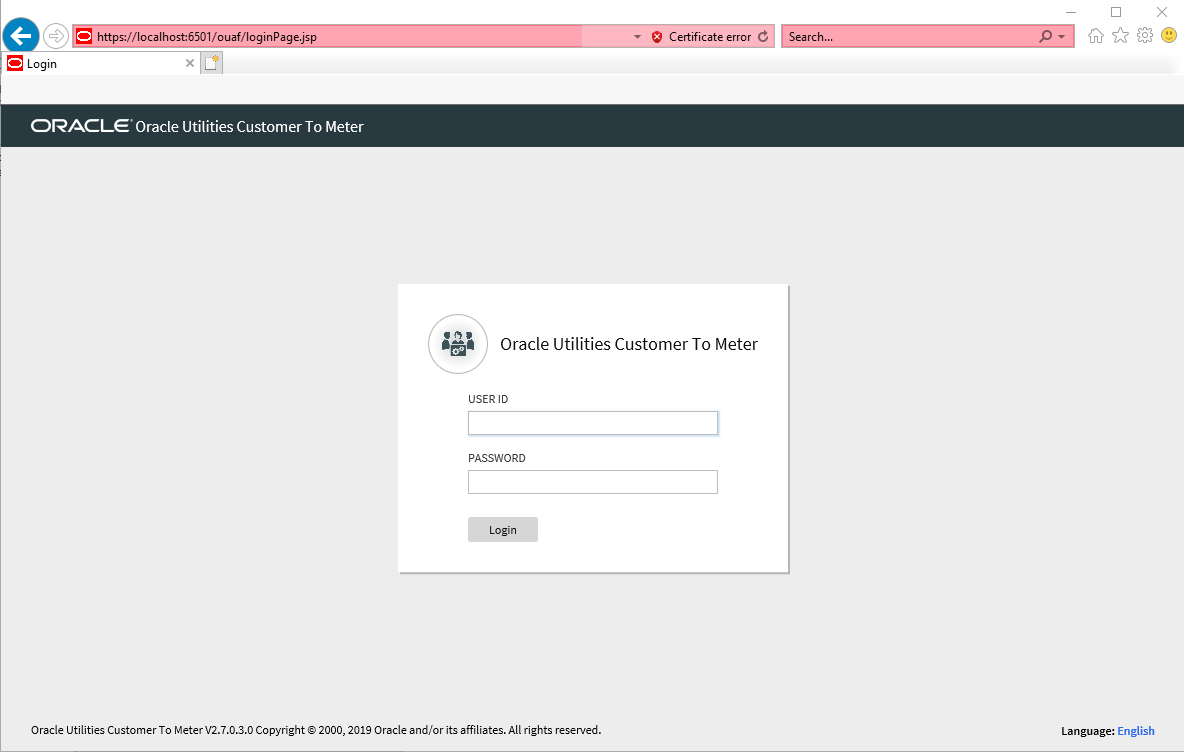
And 'sysuser00' in password
If everything has been proper you application should open up
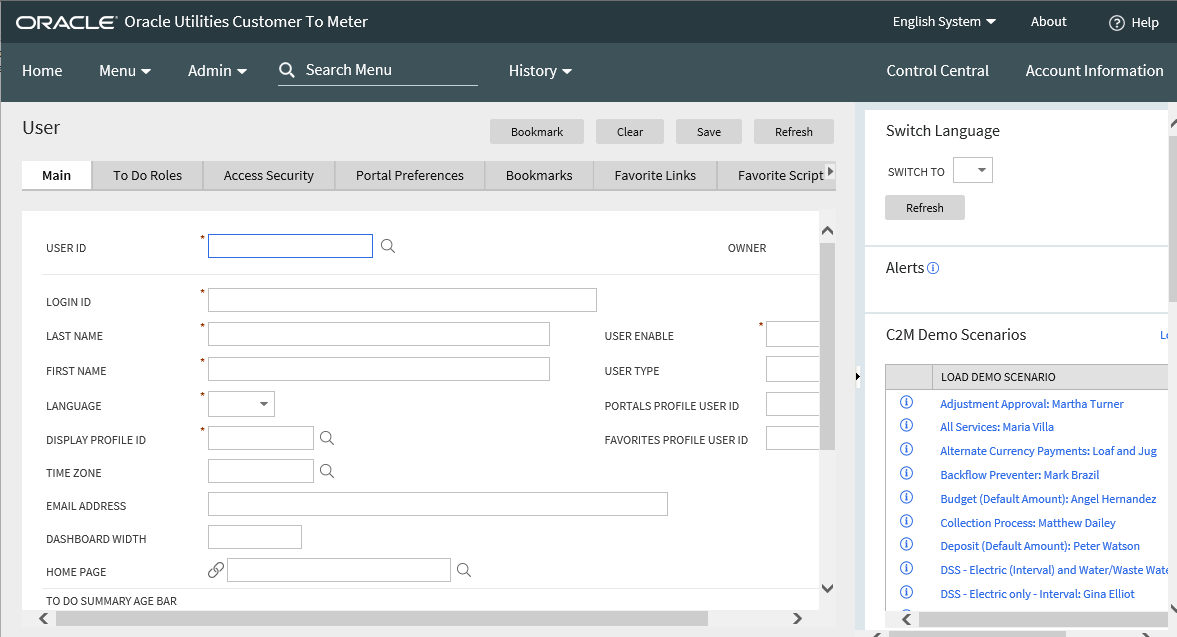
This completes the installation of C2M application
Try it out. Let me know in case of any queries.


