Oracle has already provided the documentation for mapping XAI inbound webservice with JMS consumer. [Oracle WebLogic JMS Integration and Oracle Utilities Application Framework (Doc Id: 1308181.1)]
Using above documentation you can configure a JMS consumer to monitor a JMS queue and hit the XAI inbound service of OUAF framework whenever a message arrives in the queue.
Have specified the configuration details for mapping JMS consumer to IWS web service instead of XAI inbound service. XAI inbound service has been deprecated by Oracle and Inbound Web Service is to be used in latest versions of the product.
Below example is using C2M Application. But the technical configuration is same for all OUAF products.
There is a slight difference in the configuration to be done depending on whether the JMS queue is hosted by the same server as the one hosting the OUAF application or if it is a different/external server. Have highlighted both of them in the sections below.
Local JMS queue
For Local JMS queue, JMS queue is present on the same weblogic server as that on which OUAF application is hostedFirst step is the configuration include files. For IWS, these three config files are to be created.
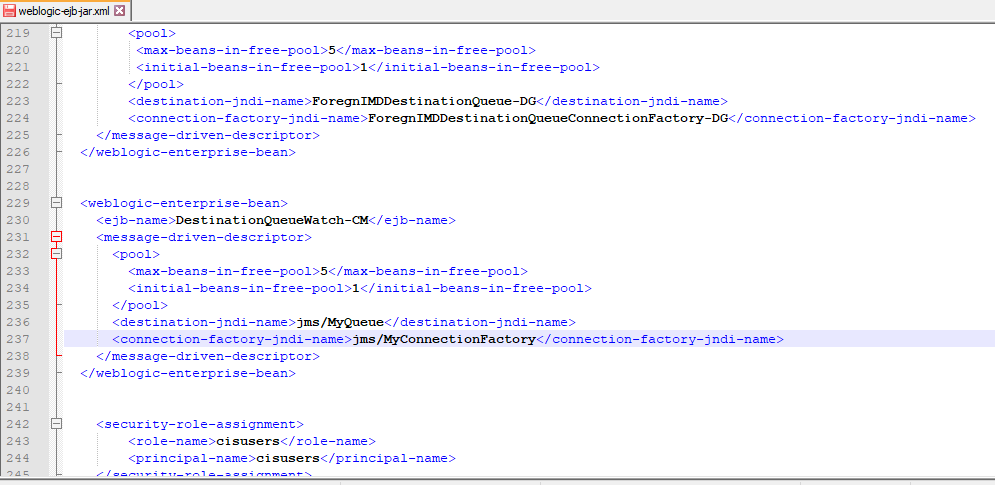
The name of the files should be same as below except the highlighted prefix part (CM)
CM_weblogic-ejb-jar.iws.xml.wls.jms.include
CM_ejb-jar.iws.xml.wls.jms_1.include
CM_ejb-jar.iws.xml.wls.jms_2.include
Once this configuration is done place the three files in the following folder:
%SPLBASE%\templates
Navigate to %SPLBASE%\bin and
Run initialSetup.cmd
Once initialSetup is completed, you can verify that the file content has been included in the config files at following location:
%SPLBASE%\splapp\iws\resources
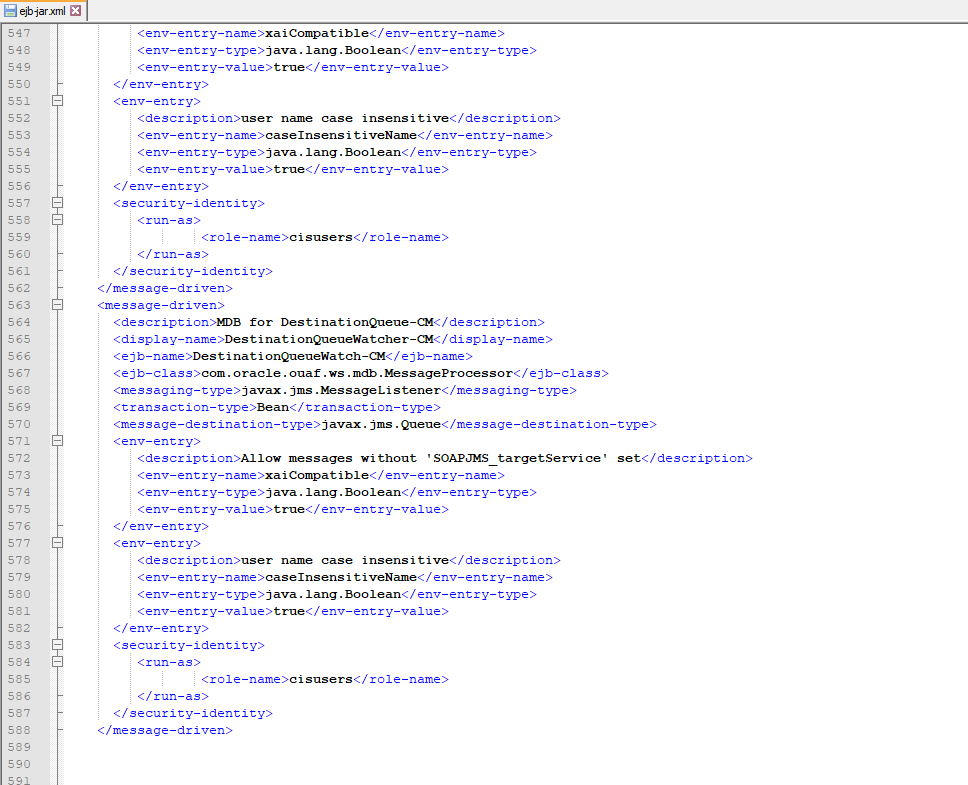
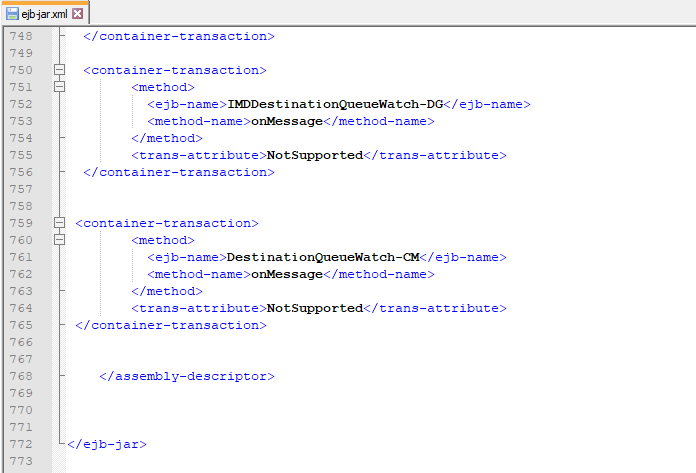
Verify that weblogic-ejb-jar.xml and ejb-jar.xml are updated with the include file content.
Once done, start the Application server from weblogic front end

Once server is started
Run iwsdeploy.cmd
(This step assumes that IWS has already been deployed before on the server. If not refer the application installation document and refer the steps for first time deployment of IWS)
Verify IWS is deployed successfully.

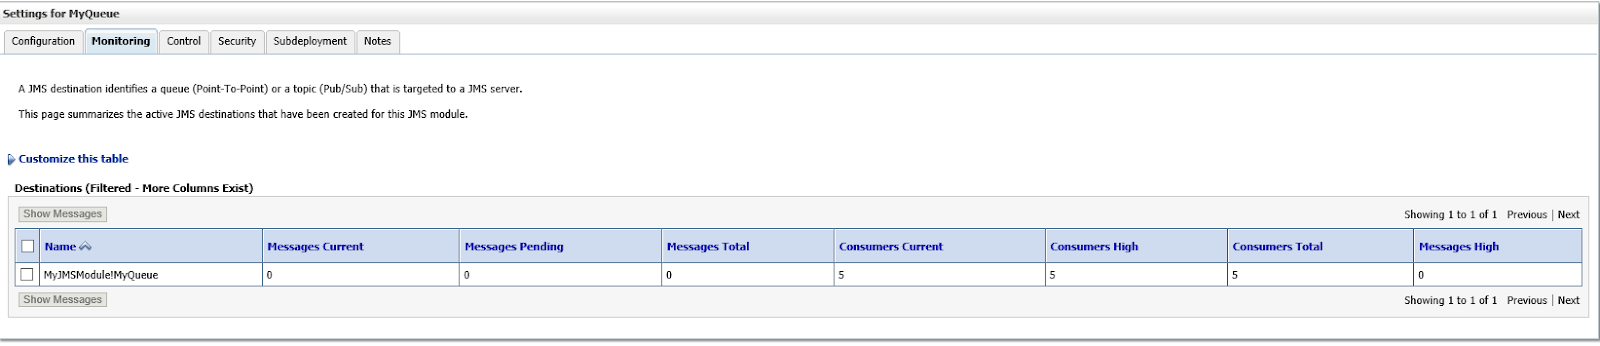
Navigate to the JMS Module and open the JMS queue.

As seen below the consumers current count is 5. This means the consumers are attached on the JMS queue and ready for consuming.

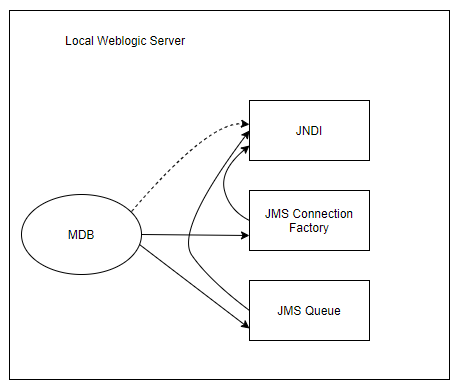
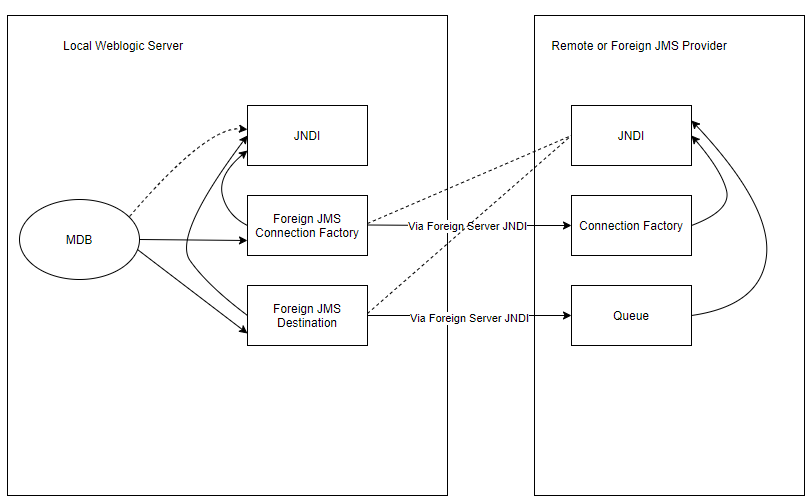
Below diagram shows a schematic representation of above configuration
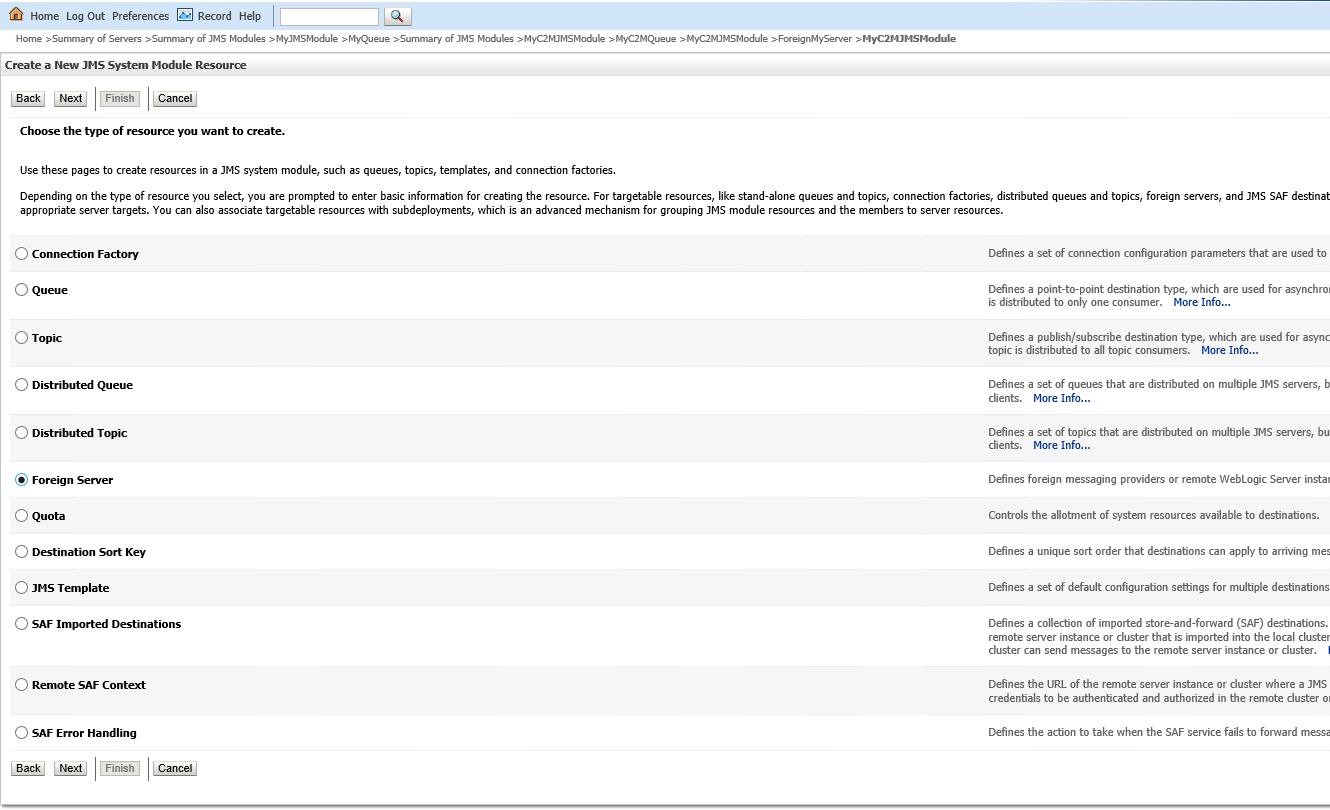
External JMS queue
For External JMS queue, JMS queue is present on either different server, on the same local weblogic instance or external weblogic/nonweblogic server.For pointing to external queue (either different server on same local weblogic instance or external weblogic/nonweblogic server), following configuration is needed.
Create a foreign server in the C2M server instance. Use a JMS module that is present on the local weblogic server.

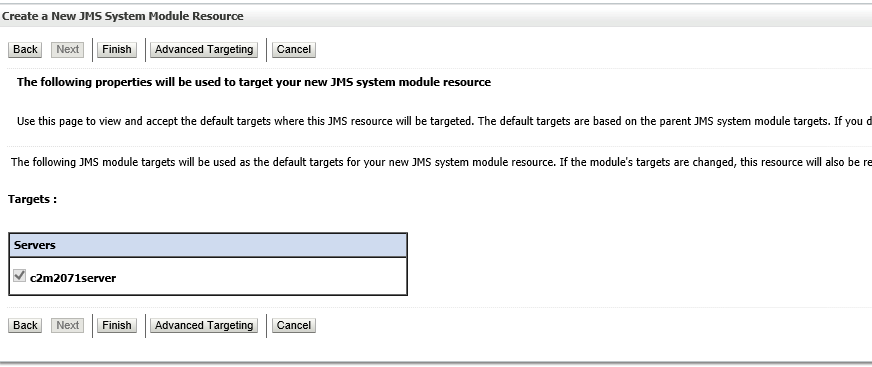
Select the same server as the one in which C2M application is hosted
As seen below Foreign Server has been created

Navigate to the Foreign Server-> Configuration -> General
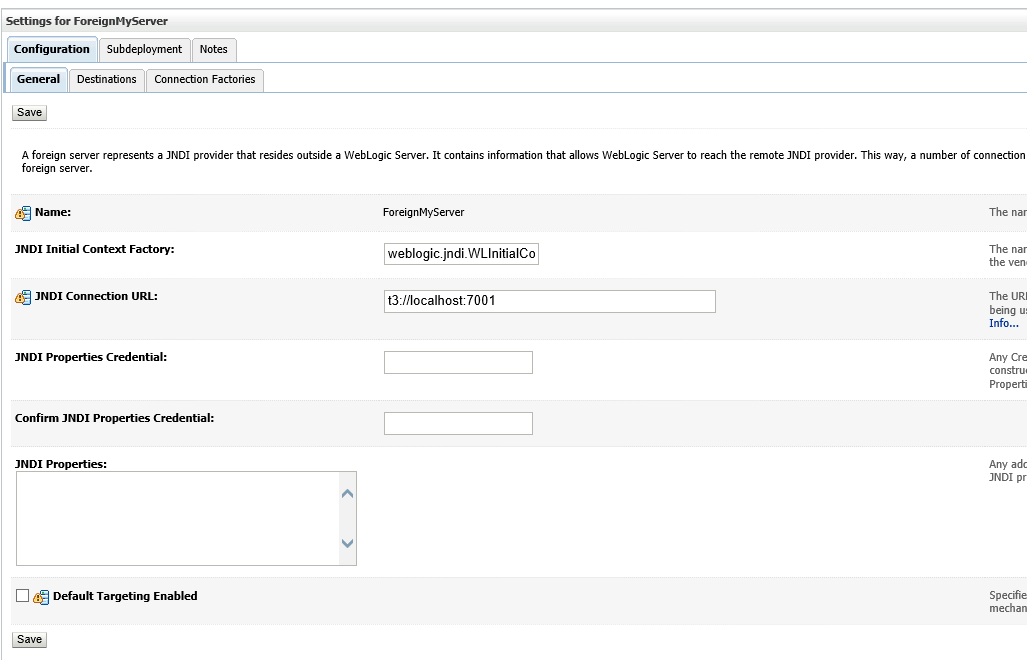
JNDI Initial Context Factory: Set to the context factory to be used for the external server. If external server is Weblogic, use weblogic.jndi.WLInitialContextFactory
JNDI Connection URL: JNDI URL of external server
JNDI Properties Credential: In case authentication is needed for external server, populate the JNDI properties Credential with the password.
JNDI Properties: JNDI properties is to be populated with user name in following way
java.naming.security.principal=remote_domain_username
Navigate to the Foreign Server-> Configuration -> Destinations
Create a new Destination
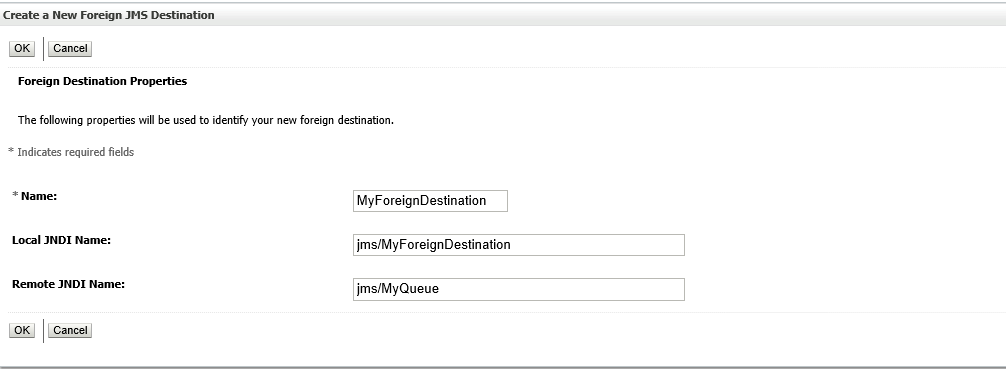
Name: Any custom name
Local JNDI name: Custom JNDI local name for queue. This is the name that is to be configured in the file CM_weblogic-ejb-jar.iws.xml.wls.jms.include in ‘destination-jndi-name’ element
Remote JNDI Name: This is the JNDI name of the queue in the external server
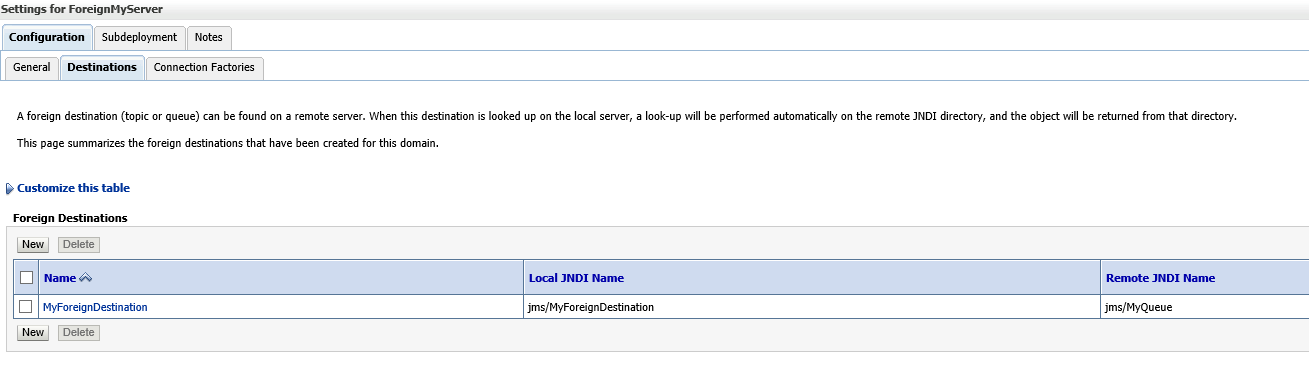
Save the configuration, as seen below the Destination is created.
Next navigate to Foreign Server-> Configuration -> Connection Factories
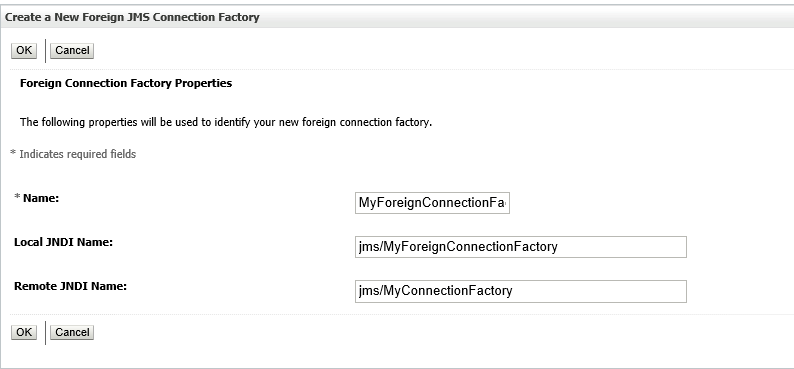
Name: Any custom name
Local JNDI name: Custom JNDI local name for connection factory. This is the name that is to be configured in the file CM_weblogic-ejb-jar.iws.xml.wls.jms.include in connection-factory-jndi-name element
Remote JNDI Name: This is the JNDI name of the queue in the external server
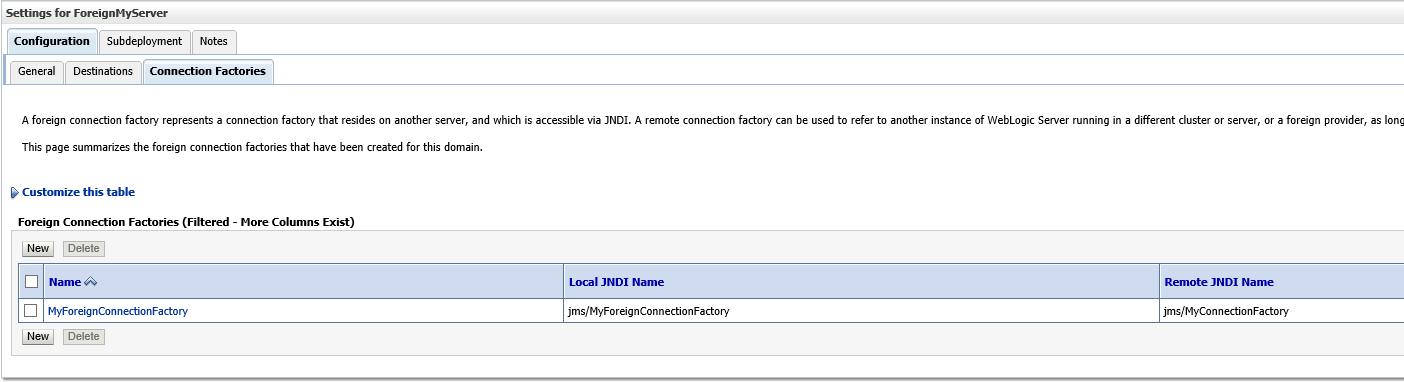
Save the configuration, as seen below the Connection factory is created.
Once this configuration is done, rest of the steps are same as for local queue.
Update CM_weblogic-ejb-jar.iws.xml.wls.jms.include with local JNDI names of queue and connection factory.
CM_weblogic-ejb-jar.iws.xml.wls.jms.include
Rest of the configuration of the three files is same as that for local JMS queue.
Once this configuration is done place the three files in the following folder:
%SPLBASE%\templates
Navigate to %SPLBASE%\bin and
Run initialSetup.cmd
Once done, start the Application server from weblogic front end
Once server is started
Run iwsdeploy.cmd
(This step assumes that IWS has already been deployed before on the server. If not refer the application installation document and refer the steps for first time deployment of IWS)
Once IWS is successfully deployed, navigate to the external server, open the JMS queue, and verify that the consumers count is non zero
As seen below the JMS queue and connection factory on external server
As seen below the consumers current count is 5. This means the consumers are attached on the JMS queue and ready for consuming.

As seen below the consumers current count is 5. This means the consumers are attached on the JMS queue and ready for consuming. Below diagram shows a representational view of the above configuration.
Testing the JMS queue consumer configuration
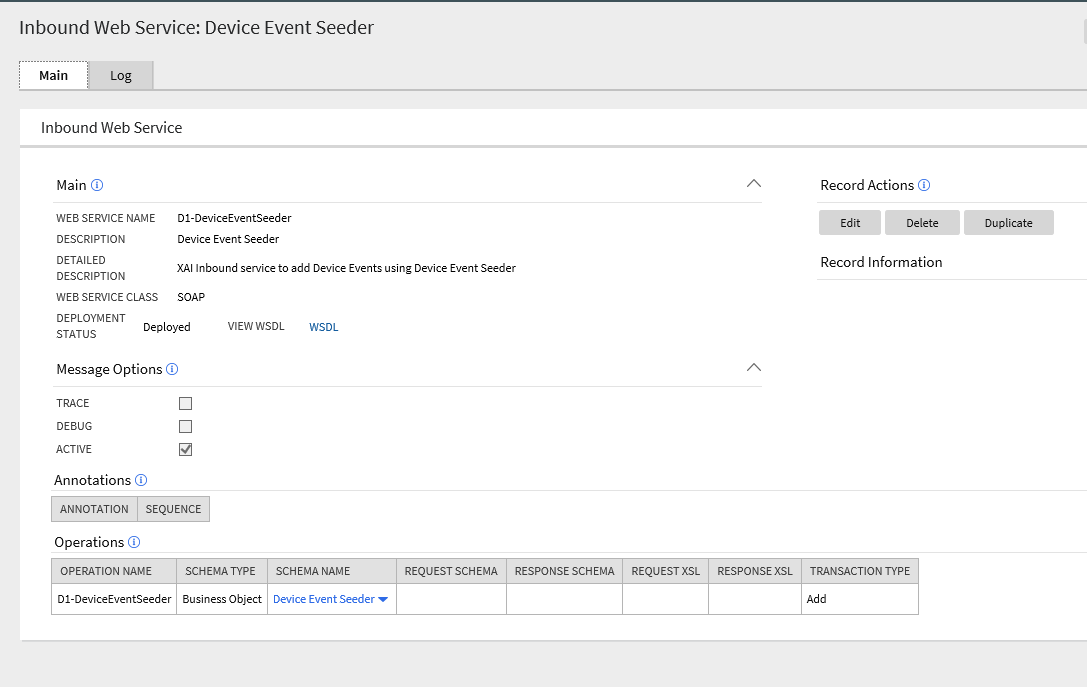
Using Device Event Seeder IWS for testing
Device screen showing the device events on a sample device. We will try to add a new device event on this device from JMS queue

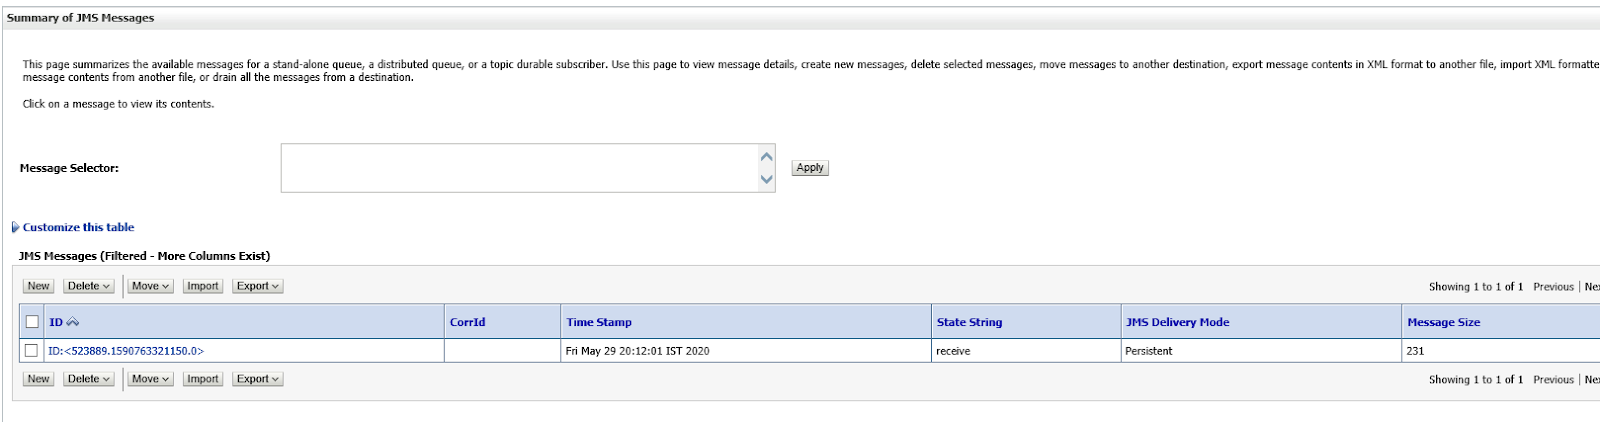
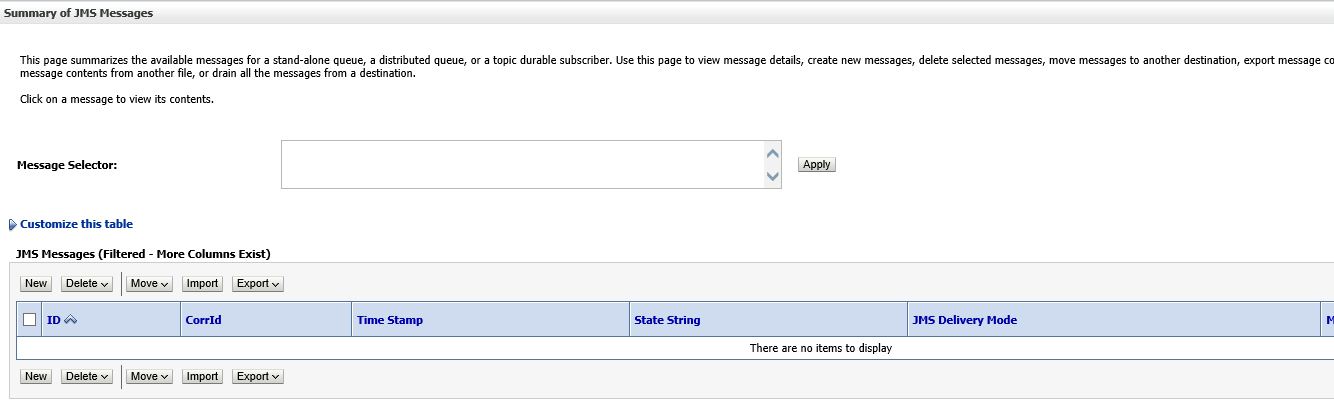
Navigate to the JMS queue on Weblogic. Select the queue and click on Show messages

Summary of JMS messages opens up. Click new button.

Produce JMS message screen opens. In the Body field copy the payload message. Below is the JMS payload used, for reference.

As seen a message is now present in the queue.
Navigate back to the monitoring screen. You can see the messages pending count is 0. That means the message has been consumed. Also message total has increased from 1 to 2.

Navigate back to show messages. As seen no message is present in queue now.
Navigate back to the C2M application device screen. As seen below new device event has been created
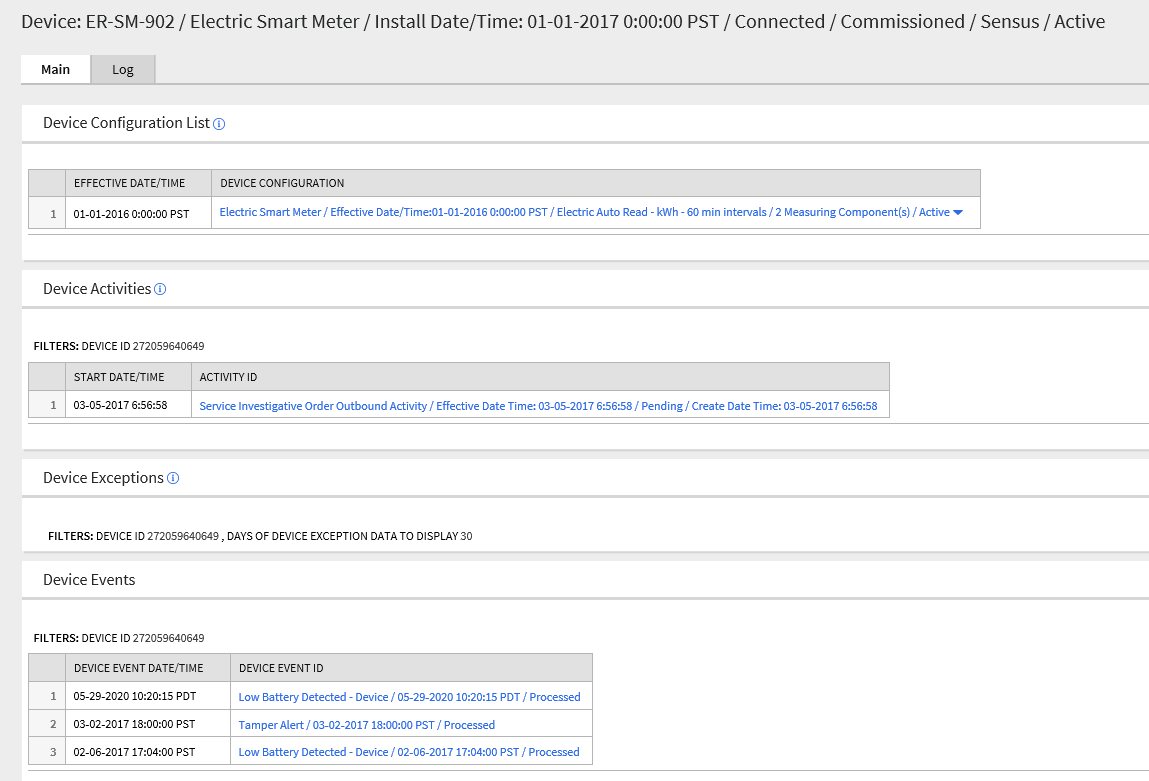
Opening the device event. As seen below device event has been successfully creating using JMS queue and JMS consumer configured earlier.